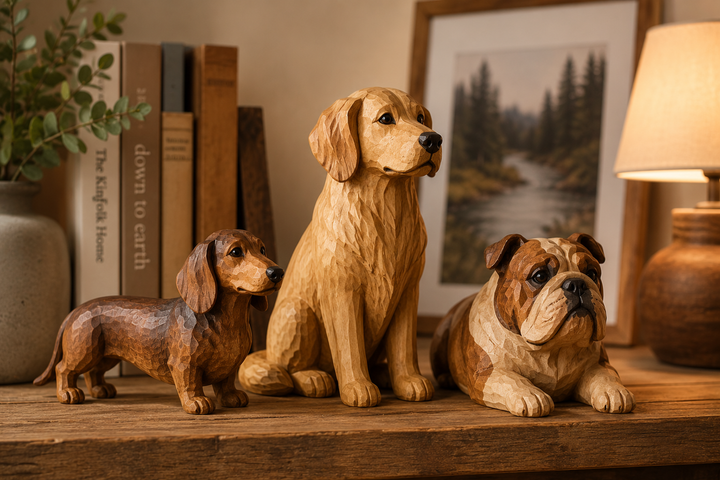
Beginner’s Guide to Making Woode Figurines at Home
You can make wooden figurines at home, even if you have never worked with wood before. Working on a diy project like this lets you express your creativity and enjoy the feel of wooden shapes coming to life in your hands. Imagine turning a simple block into a tiny animal or character. You might surprise yourself with what you can create. Ready to give it a try? Let's get started!
Tools and Materials
Essential Tools for Beginners
You don't need a fancy workshop to start making wooden figurines. You can begin with just a few basic tools. Here's a list to help you get started:
- Whittling knives: These are simple and easy to handle. You can use them for most cuts and shaping.
- Chisels: These help you make straight cuts and clean up edges.
- Gouges: These curved tools let you scoop out wood and add cool details.
You might also want a small saw for rough cutting and a pencil for marking your design. These tools work well for most diy wood carving ideas and small projects.
Choosing Wood
Picking the right wood makes carving much easier. Some types are softer and better for beginners. Check out this table to compare your options:
| Wood Type | Characteristics |
|---|---|
| Basswood | Soft, easy to carve, holds fine detail, uniform grain, forgiving for beginners. |
| Butternut | Soft, easy to carve, more visual character, pronounced grain patterns, adds natural beauty. |
| Pine | Widely available, affordable, carves reasonably well, but has resin content and grain variation. |
Basswood is a favorite for many who start with their first wooden figure. Butternut looks beautiful and feels soft under your tools. Pine is easy to find and cheap, but it can be a little tricky because of its grain.
Safety and Workspace
Safety comes first in any diy project. You want to protect yourself and keep your workspace tidy. Here's what you need:
- Safety goggles or a face shield to keep your eyes safe from chips and dust.
- Dust mask or respirator to avoid breathing in sawdust.
- Hearing protection if you use loud tools.
- Work gloves for handling rough wood (but take them off near spinning blades).
- Non-slip shoes to help you stay steady.
Keep your workspace clean and organized. A tidy area helps you focus and keeps your tools easy to find. You'll enjoy making wooden figurines more when you feel safe and relaxed.
Planning Wooden Figurines
Finding Inspiration
You may not know where to begin your first wooden figure. Inspiration can come from many places. Look around your house or garden. You can also check your favorite storybook. Many carvers get ideas from nature, animals, or simple shapes.
You can find diy wood carving ideas online or in craft books. Sometimes, seeing a wooden animal or a small box gives you new ideas. Different ways of making things cause different reactions. All ways work well.
If you want to start quickly, here are some beginner themes:
| Theme | Description |
|---|---|
| Simple Animal Figures | Projects like carving fish, birds, or cats that focus on basic shapes and proportions. |
| Decorative Items | Creating items like soap bars or simple boxes that serve both functional and aesthetic purposes. |
| Functional Tools | Building practical items such as A-frame book stands or treasure boxes that enhance usability. |
Sketching Designs
Take a pencil and paper. Begin by drawing your idea. You do not need to be good at art. Simple lines and shapes are best. Try drawing your wooden figurine from the front, side, and top. This helps you see your project from every angle.
You can use colored pencils or markers for details. If you need help, look at photos or other wooden projects. Sketching lets you change size and shape before you start carving.
Making Templates
Templates help your diy project stay easy and accurate. Draw your final design on cardboard or a flexible cutting mat. Flexible cutting mats are great for templates. They do not get wet and last a long time. You can use them again for new shapes and sizes.
Cut out your template and trace it onto your wood. This step saves time and keeps your figure's proportions right. You can keep your templates for later or share them with friends.
Starting Your Wooden Figurine
Transferring the Design
You have your template ready. Now, you need to get your design onto the wood. This step helps you see where to cut and carve. Place your template on the wood block. Hold it steady with one hand. Use a sharp pencil to trace around the edges. Make sure your lines are clear and easy to see.
If you want to make more than one wooden figure, you can use the same template again. Some people like to use carbon paper. Put the carbon paper between your template and the wood. Trace the design, and the lines will appear on the wood. This trick works well for detailed diy projects.
Cutting the Shape
You are ready to cut out your shape. This part feels exciting. You see your handmade wooden statue start to appear. Choose the right tool for your wood and design. Some tools work better for thick wood. Others are best for thin pieces or tiny ornaments.
Here is a table to help you pick the safest and most accurate tool for your diy wood carving ideas:
| Tool | Description | Uses |
|---|---|---|
| CNC router | Computer numerical control with a rotating cutting bit | Cuts thick wood at varying depths, perfect for exact shapes, raised reliefs, and complex 3D contours. |
| Laser cutter | Suitable for thinner sheets like MDF and plywood | Creates intricate shapes, perfect for repeating designs, but can burn edges. |
| Scroll saw | Thin, straight blade that moves up and down rapidly | Extremely precise for detail work and tight curves, ideal for decorative cutouts. |
| Fret saw | Similar to a coping saw with a deeper arm | Allows for intricate, curving cuts in thin materials. |
| Coping saw | Inexpensive saw for cutting curves | Good for fine, curving cuts but limited in depth. |
If you do not have fancy machines, do not worry. You can use a coping saw or a small scroll saw for most beginner projects. Hold the wood steady on your workbench. Cut slowly and follow your lines. Let the saw do the work. Do not rush. You want smooth edges for easier carving later.
After you finish cutting, you will see the rough shape of your wooden statue. This is a big step. You can already imagine how your hand-carved wooden statue will look. The next part is carving and shaping. You will turn this rough piece into a beautiful wooden figurine or even special ornaments for your home.
You can try different shapes and sizes. Every piece of wood feels different in your hands. Each wooden project becomes unique. That is the magic of handmade art.
Carving Wooden Figurines

Carving brings your wooden figurines to life. You get to shape the wood and watch your idea turn into a real object. This part feels exciting and rewarding. Let's walk through the basics so you can start your own unique hand-carved piece.
Basic Carving Techniques
You do not need fancy moves to begin. Start with simple carving techniques that help you control your tools and shape your wooden statue safely. Here are some of the most common methods:
- Whittling: Use a knife to shave off small pieces of wood. This is the easiest way to make small 3D shapes.
- Relief carving: Carve designs into a flat surface. You can use this for ornaments or to add details to your projects.
- Chip carving: Remove tiny chips of wood to make patterns or letters. This works well for handmade gifts or decorative items.
When you use your carving tools, try these basic cuts:
- Push cut: Push the knife away from your body for a clean, controlled slice.
- Rough cut: Remove bigger chunks of wood quickly. This helps you get the basic shape fast.
- Paring (pull) cut: Pull the knife toward you for fine shaping and smooth edges.
- Stop cut: Make a shallow cut to create corners or borders. This keeps your lines sharp.
Shaping Features
Now you have a rough shape. It's time to add features and details. This step makes your wooden figurine or hand-carved wooden statue look special. Many beginners make the same mistakes, so keep these points in mind:
- Pick the right wood. Soft wood like basswood or butternut works best for easy wood carving projects.
- Use sharp, good-quality carving tools. Dull blades can slip and cause accidents.
- Don't press too hard. Gentle pressure gives you more control and stops the wood from chipping.
- Start with simple patterns. Complicated designs can be frustrating at first.
- Don't skip sanding. Pre-sanding helps your handmade piece look smooth and finished.
Try to work slowly. Look at your figure from every angle. If you want to add eyes, ears, or other features, draw them on first with a pencil. Then carve small amounts at a time. You can always take off more wood, but you can't put it back!
Carving Animal Figures
Animal figures make great beginner projects. Their shapes are simple, and you don't need to add lots of tiny details. Here are some easy animals you can try:
- Fish
- Birds
- Cats
These animals have smooth lines and basic forms. You can finish them quickly and feel proud of your work. Try making a fish first. Draw the outline, cut the shape, and use whittling to round the body. Add a tail and fins with stop cuts. For a bird, start with an oval body and a small beak. Use paring cuts to shape the wings. Cats are fun too. Focus on the head and tail, and keep the body simple.
When you finish your first animal, you'll see how much fun diy projects can be. Each wooden figurine you make will be a unique hand-carved piece. You can give them as hand-carved gifts or keep them as special decorations. Every project helps you learn new skills and build your confidence.
Finishing Touches
Smoothing and Sanding
You've finished carving your wooden figurine. Now, you want it to feel smooth and look polished. Grab some sandpaper and start with the rough spots. Use a grit of 80 or 100 first. Move to 150-180 for a finer finish. Finish with 220 or 320 to polish your project. Here's a quick guide:
| Grit Type | Purpose |
|---|---|
| 80 or 100 | Knock down rough spots |
| 150-180 | Smooth the surface |
| 220 or 320 | Polish for a shiny finish |
Always sand along the grain of the wood. Wipe away dust with a damp cloth. Your handmade figurine will feel great in your hands.
Painting or Staining
Painting or staining adds personality to your wooden ornaments. You can choose bright colors or keep things natural. Try liquid watercolors for vibrant, non-toxic results. Earth Paint gives you organic, mineral colors. Melted crayon works well on heated wood and doesn't always need sealing. If you want more options, you can use chalk paint, acrylic craft paint, spray paint, or common latex paint.
- Liquid watercolors
- Earth Paint
- Melted crayon
- Chalk paint
- Acrylic craft paint
- Spray paint
- Common latex paint
Let your creativity shine. Paint simple shapes or add details to your diy projects. Make each carving unique.
Sealing and Displaying
Sealing protects your wooden figurine and keeps colors bright. Beeswax is a natural choice. Vegan alternatives like Candelilla wax work well too. For extra protection, use wood varnish with UV protection, especially if your carving sits in sunlight.
When you display your figurine, keep it safe. Store it in a glass display case to protect from moisture. Choose a room with stable humidity, around 40-50%. Avoid direct sunlight. Place your wooden projects away from windows or use UV-filtering glass.
Tips and Common Mistakes
Beginner Tips
Starting your first diy wood carving project can feel a bit overwhelming, but you can make it easier with a few smart habits. Here are some tips to help you enjoy the process and get better results:
- Start with simple projects. Try making animal figures or basic ornaments before moving to more detailed shapes.
- Practice regularly. The more you carve, the more control you'll have over your tools.
- Focus on tool control. Pay attention to how each tool feels in your hand and how it moves through the wood.
You'll also want to pick the right wood for your first projects. Basswood is soft and easy to carve, so it's perfect for beginners. Butternut has a nice grain and is still manageable. White pine is very soft and great for practice.
Troubleshooting
Sometimes, your carving might not look as smooth as you hoped. If you see uneven spots or rough edges, try these steps:
- Use sharp tools. Dull blades can make carving harder and leave rough marks.
- Be patient. Take your time and look at your work from different angles before making each cut.
- Carve with the grain. If you carve against the grain, the wood can split or tear. Adjust your direction to follow the natural lines.
If you run into problems, stop and check your progress. Small changes can make a big difference in how your wooden ornaments turn out.
Staying Safe
Safety should always come first when you work on diy projects. Here are some important rules to follow:
- Wear safety glasses and a dust mask to protect yourself from dust and flying chips.
- Keep your hands behind the cutting edge and secure your workpiece before you start carving.
- Always cut away from yourself and keep your non-cutting hand out of the blade's path.
- Use cut-resistant gloves while you're learning to help prevent injuries.
- Trust your instincts. If something feels unsafe, stop and check before you continue.
You can start your first diy wooden figurine today, no matter your skill level. Woodworking helps you relax, boosts your mood, and gives you a sense of pride. Try simple projects first and follow these steps:
- Pick an easy design.
- Use soft wood like basswood.
- Sketch, carve, and finish your piece.
Want to share your creations? Join a friendly Facebook group:
| Community Type | Link |
|---|---|
| Facebook Group | https://www.facebook.com/groups/1675907215955924/ |
Keep practicing and enjoy making something special with your hands!
Frequently Asked Questions
How long does it take to finish a wooden figurine?
You can finish a simple wooden figurine in a few hours. If you add details or paint, you might need a day. Take your time and enjoy the process.
What is the best wood for beginners?
Basswood works best for most beginners. It feels soft and easy to carve. You can also try butternut or pine if you want to explore different types.
Can kids try woodwork safely?
Yes, kids can try woodwork with adult supervision. Use safe tools and always wear safety gear. Start with easy shapes and simple projects to build confidence.
Do I need expensive tools to start?
No, you do not need expensive tools. A basic knife, a small saw, and sandpaper will help you start. You can add more tools as you try new projects.
How do I fix mistakes in my carving?
You can sand small mistakes or carve them into new shapes. If you make a big error, turn it into a creative detail. Every project helps you learn and improve.