Cat Wood Carving: From Simple Figurines to Heirloom Art (Step by Step)
Key Takeaways
Cat wood carving is a rewarding craft that lets cat lovers transform a simple block of wood into an expressive feline figurine, perfect for gifts, home decor, or personal keepsakes. Whether you carve your own or collect handcrafted pieces, understanding the process deepens your appreciation for the art.
- Beginners can start with a simple sitting or sleeping cat, focusing on basic shapes, smooth curves, and clearly defined front legs and tail. Carving a cat can be completed in a weekend with the right preparation.
- More advanced carvers can refine anatomy like ears, eyes, and paws, then experiment with finishes that highlight the wood grain, similar to handcrafted pieces at Wooden Smile such as the Calico Cat Figurine – Seated, Cloud Cat, and Sleeping Cat decor.
- Careful planning with templates, reference photos, and research matters more than complex equipment. A sharp tool is critical for effective wood carving techniques at every skill level.
- This article provides step-by-step planning guidance, design ideas, and finishing tips, plus a short FAQ answering practical questions about wood choice, time investment, and painting.
Introduction: Why Cat Wood Carving Appeals to Cat Lovers
Few animals lend themselves to wood carving as naturally as cats. Their elegant curves, compact poses, and expressive faces create silhouettes that practically beg to be shaped from a solid piece of wood. For many cat lovers, a carved wooden cat captures something a photograph cannot: the warmth of a handmade object combined with the personality of a beloved pet. It is no surprise that feline subjects have appeared in carving traditions for centuries, from the famous Nemuri-neko relief at Japan's Nikkō Tōshō-gū shrine to folk art carvings characterized by rounded forms and playful features.
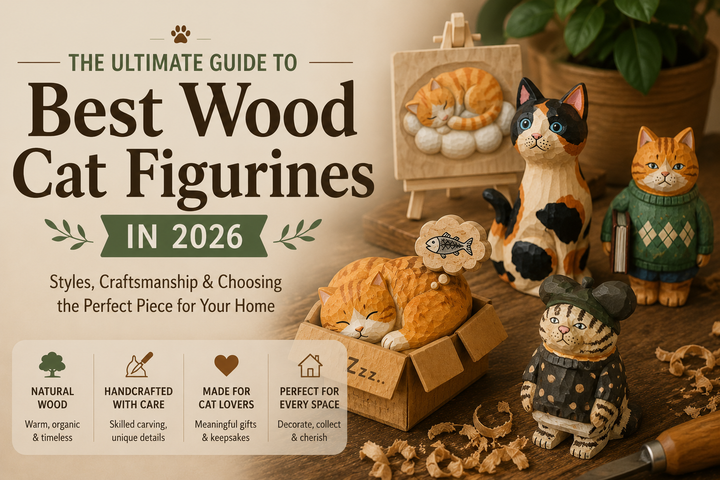
Cat wood carvings range from small palm-sized figurines to larger mantelpiece sculptures. Some are minimalist silhouettes with barely a line to suggest the face; others are highly detailed, realistic works showing every whisker pad and paw. Relief carving involves carving into a flat panel of wood to create raised feline forms, while in-the-round sculptures are fully freestanding. Studios like Wooden Smile demonstrate the breadth of this craft with hand-finished pieces like the Calico Cat Figurine – Seated (upright posture, attentive expression) and the Sleeping Cat decor (curled pose, serene face).
The focus of this article is on understanding design, planning, and process. Whether you want to create your own cat carving or simply better appreciate the handcrafted wood carvings you buy, the principles are the same.

Choosing the Right Cat Pose: Sitting, Sleeping, and Cloud-Like Designs
The pose you choose affects difficulty, stability, and how much detail you must carve. A cat with legs extended in mid-leap demands far more skill than one curled into a compact ball. Before you pick up a knife, decide which pose matches your ambition and where you plan to display the finished piece.
A seated cat with front legs straight and tail curled around one side is one of the most classic poses in cat carving. It gives you clearly separated legs, an upright head, and room for expressive ears and eyes. This is the approach you will see in pieces like Wooden Smile's Calico Cat Figurine – Seated. A curled-up sleeping cat, on the other hand, reduces exposed limbs to almost nothing. The body becomes a low, rounded shape with the head tucked against the paws, making it far more forgiving for beginners. The Sleeping Cat decor for home follows this idea closely. A third option is the whimsical "cloud cat" pose, loosely inspired by the Cloud Cat Home Decor, where the entire form softens into gentle, stylized curves. Minimalist designs like this have smooth silhouettes with few details, making them approachable and visually striking.
Pose also influences balance. Wide, low shapes such as sleeping cats sit stably on any surface. Tall, upright poses may need a wider base or an integrated plinth to prevent tipping. Choose a pose that matches your skill level and the intended location: a slim figurine for a narrow shelf, a compact cloud cat for a bedside table.
Picking Wood Species and Block Size for Cat Carving
Wood choice matters for both carving ease and the final appearance of your piece. The species you select determines grain visibility, color, how crisply you can define details, and how durable the finished cat will be.
Wood selection for carving should include soft, straight-grained woods, especially for your first project. The best wood choices for carving include basswood and tupelo, both prized for their even texture and minimal tear-out. You can also use tulipwood for carving cat figures; it carves cleanly and accepts paint well. These softwoods are forgiving when shaping curves like the cat's back and tail. Alternatives to tulipwood include beech, maple, or sycamore. These slightly harder woods hold crisp detail in ears, eyes, and front legs but require sharper tools and more control. Fruitwoods like cherry and pear offer rich color for natural-finish pieces.
A typical wood block size is 185 x 100 x 80mm, which comfortably accommodates a seated cat figurine of roughly 150–200 mm in height. For a curled sleeping cat, you will want a slightly lower, wider block. When selecting your block, check for knots and cracks, especially in areas where delicate parts like ears, the tail, or front paws will be carved. A hidden crack in an ear tip can ruin hours of careful work.
The visual impact of different woods on cat carvings is significant. Light-colored woods like basswood suit painted or pastel cloud cat pieces. Richly grained woods like walnut or cherry look striking with a natural oil finish, where the grain becomes part of the fur pattern.
Gathering Tools and Safety Gear for Wood Carving
Cat carving can be done with a compact set of tools. You do not need a workshop full of equipment to start. What matters most is that every blade is razor-sharp and that you handle it safely.
Common tools for carving include a whittling knife and a roughing knife. The roughing knife removes large amounts of material during the early blocking stage, while a smaller detail knife handles fine work around the face and paws. Whittling is a common method of wood carving using a knife, and it remains the backbone of most small figurine projects. Beyond knives, Swiss gouges are essential tools for wood carving. A small set with #3 and #5 sweep profiles covers most needs, from shaping the curve of the shoulders and flanks to hollowing areas beneath a tucked tail. A V-tool separates the front legs and defines the tail line with clean v cuts. Optional micro-gouges handle the smallest features like the mouth and inner ear.
Safety gear like cutting gloves is recommended for wood carving, along with thumb guards, eye protection, and a dust mask for sanding. A non-slip bench mat and proper lighting prevent the piece from shifting during delicate cuts near thin features like paws or the tail. Secure clamping is especially important on small wood carvings.
Planning Your Cat: Research, Sketching, and Templates
Planning saves time and prevents proportion problems, especially with expressive animals like cats. An hour spent sketching and measuring pays off many times over once you begin removing material.
Start by researching poses. Study pictures of real cats from front, side view, and back. Pause videos to capture natural postures like stretching, loafing, or watching a window. Carving from photographs helps capture accurate body proportions and poses. You can search online, including google, for reference images and discover angles you might not have considered. Various online resources provide cat carving templates that you can download and print.
Next, draw front, side, and top views on paper. Mark key landmarks: the top of the ears, chin, chest, front legs, rump, and tail base. Sketching the design on the wood block aids in carving cat figures because it gives you a visible map. You can photocopy patterns to fit your wood block, scaling a small drawing up or down using grid paper or a photocopier. Templates help achieve accurate dimensions and textures, and you can use a picture as a template for carving by tracing key outlines. The whole process of carving a wooden cat involves sketching, shaping, and detailing, and this planning stage anchors the rest.
Mark important features directly on the block: a center line down the middle, a shoulder line, the front of the chest, the position of the front legs, and the curve path of the tail. If you prefer minimalist designs like the soft, rounded Cloud Cat style, simplify your sketches into gentle, flowing lines rather than realistic anatomical detail.
Blocking Out the Basic Cat Shape
The goal at this stage is to move from a simple block to a recognizable cat silhouette using large, confident cuts. You are not carving details yet; you are defining the overall shape and proportion.
Start by tracing the outline from the template onto all visible faces of the wood block. Rough out the profile from the side view first, sawing or carving away large waste areas. Then rotate and repeat for the front view. Remove excess material to create organic shapes, leaving generous margins around features you will refine later.
For a sitting cat, block in a cylindrical body, a flat area for the chest, and a separate mass for the head. Keep extra width at the front to allow splitting the front legs later. Round the corners to suggest the cat's spine and flanks, and taper the block at the neck. For a sleeping cat, carve a low, oval shape with a raised shoulder hump and a gentle depression where the head rests on the paws.
Stop frequently. Rotate the piece and compare the left and right sides from arm's length to maintain symmetry and natural cat proportions. This step is about establishing big forms confidently. Do not rush into details while the overall body still reads as a rectangle.

Defining Anatomy: Head, Ears, Eyes, and Front Legs
Subtle anatomy details give a cat carving its character and personality, even in stylized pieces. This is the stage where a vaguely cat-shaped block starts to feel alive. Realistic cat sculptures focus on anatomy and natural poses, but even a simplified piece benefits from thoughtful proportions.
Separate the head from the body with gentle cuts at the neck, creating a slight indentation all around. Then round the cheeks and define the muzzle area where the nose and whisker pads sit. Use sweep cuts to round the corners of the head into a natural, slightly domed shape.
For the ears, mark a triangle for each ear at the top of the head. Define the ears with v cuts from the top, then refine each one into a soft, slightly curved shape rather than a sharp spike. Overly pointed ears create a "fox" look that reads wrong on a cat. For the eyes, sleeping cats need only simple closed-eye lines carved with the tip of a detail knife. Stylized pieces can use small almond-shaped recesses, while carvers planning to paint irises and pupils may carve deeper sockets. Fine details in carving can improve with small intersecting cuts, allowing you to add the mouth, a subtle nose, and the contour of the face with precision.
To shape the front legs, carve a shallow groove down the center front of the body, then widen it carefully so the two front legs stand apart. Round each leg and add subtle paw pads or toe hints at the feet. Note that many decorative figurines suggest paws and facial features with just a few precise cuts and smooth transitions rather than hyper-realistic fur texture.
Carving the Tail, Hindquarters, and Overall Flow
The tail and hind legs help express the cat's mood and also influence how sturdy the carving is. A tail that wraps neatly around the front paws suggests a composed, seated cat. A tail tucked along the body works for a sleeping piece, while a gently arched tail suits a more whimsical cloud cat pose.
Connect the tail to the body for strength. Keep it attached along part of its length rather than carving it as a thin, freestanding rod. Gradually round the transitions where the tail meets the rump so the connection looks natural, not bolted on. Avoid leaving thin, unsupported sections that could snap during handling.
Shape the hindquarters by forming the curve of the hips and thighs. Add a hint of the hind paw emerging from beneath the body. Check that the rear view looks balanced and not too narrow from either side. The angle at which the hindquarters taper into the tail should feel like a continuous curve.
Pay attention to the "flow line" of the entire piece: the continuous curve that runs from the tip of the ears along the back, over the rump, and onto the tail. This line is what makes a cat carving read as elegant and catlike from every view. Step back often, checking from multiple angles so the cat looks fluid and coherent as a single form.
Sanding, Surface Texture, and Preparing for Finish
Good surface preparation makes even simple carvings look refined. If your piece will be handled or displayed prominently at home, this step determines how professional it feels.
Follow a basic sanding progression: 120 grit to remove rough tool marks, then 180, 240, and finally 320 grit for a smooth surface. Sand with the grain along larger areas like the cat's back and flanks to avoid visible scratches. Smooth out the carving by removing chips and balancing details across the whole form so no single area feels rougher than its neighbors.
You can preserve or deliberately soften tool marks depending on the style you want. Leaving subtle knife facets gives a handcrafted, folk-art character. Sanding nearly smooth creates a serene, clean finish ideal for cloud-like cat styles. Delicate details around the ears, eyes, and front legs should be supported with your fingers when sanding to prevent breakage, and may be better refined with a sharp knife rather than aggressive sandpaper.
Blow or brush away dust from recesses around the tail, between front legs, and under the chin so that finish coats adhere evenly and do not clump. If you are evaluating finished wood carvings to buy, examine how smoothly these transitions are executed. It is one of the clearest signs of careful craftsmanship.
Finishing Options: Oils, Waxes, and Painted Cat Wood Carvings
Finish choices change both the look and durability of a cat carving. You can emphasize the natural wood grain for understated elegance or add colorful painted designs inspired by a real pet's coat.
Clear, natural finishes work beautifully on richly grained woods. Penetrating oils like boiled linseed oil or tung oil soak into the surface to deepen color, followed by a coat of paste wax for subtle sheen. These are ideal for simple, elegant decor pieces where the wood itself is the star.
Painted finishes open up another world. Acrylic paints let you mimic specific coat patterns such as calico, tuxedo, or tabby. Wooden Smile's Calico Cat Figurine – Seated shows how multi-tone coats can be stylized yet recognizable. When painting, block in a light base color first, then add darker patches for the pattern. Layer fine details: the eyes, nose, inner ears, and any markings on the paws. Seal the finished painting with a clear topcoat of polyurethane or acrylic varnish to protect against handling.
Matte finishes suit subtle, contemporary cloud cat looks. Semi-gloss gives a more traditional or gift-oriented feel for cat carvings displayed on shelves or desks. Allow oils to dry thoroughly, often several days to a week, before waxing or packaging the piece as a gift so the surface does not feel tacky.

Display, Gifting, and Collecting Handcrafted Cat Carvings
Cat wood carvings fit naturally into home decor for cat lovers. Place them on bookshelves, bedside tables, office desks, or cluster a group on a mantel for a curated look. They bring warmth and personality that mass-produced objects simply cannot match.
For display, keep figurines away from direct sunlight and radiators to avoid cracking or warping over time. Use non-slip pads under bases, and arrange groups by size or pose. When gifting, consider matching a carving to the recipient's real cat based on color and pose. A sleeping cat makes a comforting memorial piece, while a playful cloud cat can celebrate a new kitten.
If you prefer to buy rather than carve, support small studios and makers who pour genuine skill into each piece. Curated collections like those at Wooden Smile showcase different moods, from calm sleeping cats to watchful seated ones. To start a collection, focus on variety of poses, woods, and finishes. Keep notes on where and when each piece was acquired. Over time, a collection tells a story, and that is what transforms decor into something people adore.
Wooden Smile vs. Other Cat Wood Carving Brands
While the cat wood carving and handcrafted figurine market is filled with options, significant differences exist in brand positioning, craftsmanship, and emotional expression. Below is a multi-dimensional comparison between Wooden Smile and three major categories of brands/products on the market: mass-produced factory brands, Japanese minimalist wooden brands, and traditional folk carving workshops.
1. Mass-Produced Factory Brands (Amazon / Generic E-commerce Brands)
- Carving & Texture: Mass-produced items typically use machine CNC molds or plastic injection, lacking the natural grain and texture of real wood. Wooden Smile insists on 100% artisan hand-carving, preserving unique chisel marks and subtle hand-crafted details that make every wooden cat one-of-a-kind.
- Coloring & Vintage Charm: Factory items rely on uniform industrial spray paint, which often looks stiff and lifeless. In contrast, Wooden Smile applies hand-painted multi-layer colors combined with a signature vintage distressed finish, preserving a natural weathered look and warm historical charm that adds true artistic value.
2. Japanese Minimalist Brands (e.g., T-Lab PolePole / Mokuomo)
- Style & Design Language: Japanese brands favor a Scandinavian-inspired, minimalist aesthetic with smooth lines and high abstraction. Wooden Smile focuses on storytelling and character design—from detailed outfits (like overalls or green berets) to anthropomorphic expressions (a street cat’s stubbornness or a sleeping cat’s relaxation), giving each cat a vivid personality and relatable vibe.
- Emotional Connection: Compared to the quiet elegance of minimalist decor, Wooden Smile's pieces feel like frozen moments from a warm story, making it easier for buyers to form a true emotional connection—like keeping a comforting little companion.
3. Traditional Folk Carving Workshops (e.g., Novica / Handcraft Platforms)
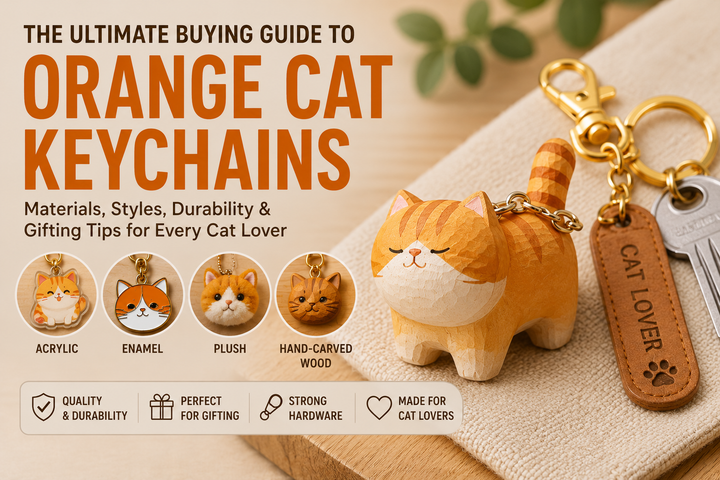
Target Audience & Usability: Traditional folk carvings lean toward large collectible pieces or abstract folk art, which can be expensive and hard to integrate into modern desk setups. Wooden Smile balances affordability with practical use, bringing handcrafted art into daily life through desk decor, keychains, fridge magnets, and custom pet items—making warm handcrafts accessible to urban professionals.
Brand Comparison Matrix
| Feature / Dimension | Wooden Smile | Mass-Produced Brands | Japanese Minimalist Brands | Traditional Folk Workshops |
|---|---|---|---|---|
| Craftsmanship | 100% Hand-carved + Vintage hand-painted |
Machine molded, industrial spray paint |
Semi-handmade / Machine polished, smooth finish |
Traditional hand-carved, lacquered or waxed |
| Design Style | Vintage warm, narrative, rich character |
Single design, highly generic |
Minimalist, smooth, abstract cute |
Traditional art, folk style, heavy sculptural feel |
| Brand Soul | Slow-living comfort, warm desk companion |
Purely decorative disposable item |
Aesthetic design, spatial accent | Fine art collection, cultural expression |
| Customization | Custom pet portraits & free engraving |
None | Very rare | Limited to high-end, expensive orders |
| Value for Money | High quality & accessible ($20–$30 range) |
Very low ($5–$10), poor quality |
Mid-to-high ($30–$50) | High / Premium ($60–$100) |
FAQs about Cat Wood Carving
How long does it take to carve a small wooden cat?
A simple, palm-sized sleeping cat can often be carved and sanded over a weekend, roughly 6–10 hours of focused work. More detailed seated cats with defined front legs, eyes, and painted coats may take 15–20 hours across several days, including finishing and drying time. The longer you spend on painting and curing multiple coats, the more the total time stretches.
Is cat wood carving suitable for complete beginners?
It can be, provided beginners start with soft wood like basswood, choose a safe and simple pose such as a rounded sleeping cat, and follow basic knife-safety rules. Practice on scrap pieces first to learn common cuts like sweep cuts and v cuts before attempting thin features like ears or tails. Many people acknowledge that their first piece will not be perfect, and that is entirely fine. The fun is in learning.
Can I carve a wooden cat that looks like my own pet?
Work from multiple photographs of your real cat taken from the front, side, back, and close-ups of the face. Capture key identifiers such as coat pattern, body type (slim versus round), and the cat's typical pose. Many makers, including small studios, offer custom colors or pattern variations on existing cat carvings. You can agree on details like markings and eye color before the work begins, so the finished piece truly resembles your pet.
What finish is best if the carving will be handled often?
Durable, low-maintenance finishes such as hard-drying oils plus wax, or acrylic paint sealed with a clear polyurethane or acrylic varnish, resist skin oils and dust better than bare wood. You can comment on how a well-sealed surface stays clean longer. Occasional gentle wiping with a soft, dry cloth is all you need, and avoid water or harsh cleaners that could damage the finish.
How should I care for and clean painted cat wood carvings?
Keep carvings away from prolonged moisture and direct sunlight. Dust them with a soft brush or microfiber cloth and avoid household sprays that could cloud the finish. Well-finished wood carvings, whether painted or natural, can last for decades with only minimal care. If a piece begins to look dry after years of display, a light application of paste wax can refresh its appearance without harming the paint or wood beneath.