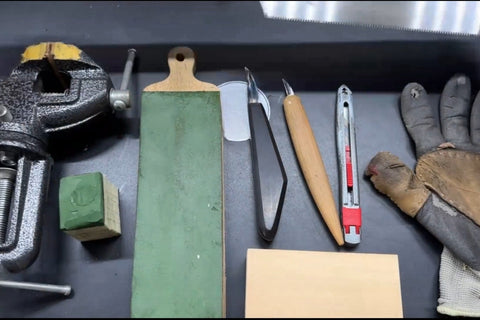
Wood Carving Safety: Choosing Gloves and Controlling the Knife
Wood carving safety starts with controlling where the knife can go. Wear suitable cut-resistant protection, keep your hands and body clear of the blade, support the wood, and stop when a cut catches. These wood carving safety tips focus on using a hand-held carving knife.

How to Choose Wood Carving Gloves
Use a cut-resistant carving glove on the hand holding the wood. Choose protection suited to the task that still lets you hold the piece securely and control your fingers. Follow the glove maker's instructions for use and replacement.
When comparing whittling gloves, start with the job: your holding hand needs protection while it supports and turns the wood. Check the model’s intended use and protection information, then check fit and grip. A high cut rating alone does not answer all three questions.
Fit and control
Choose wood carving gloves that fit securely around your fingers and palm. With the knife set aside, check that you can hold and turn the block without loose material interfering with your grip. Protection needs to work with the hand control you use throughout the carving.
Read the label
Look up the exact glove model and its intended use. Cut resistance and puncture resistance are separate test results; a cut rating does not mean the glove will stop a knife tip. ANSI/ISEA and EN markings use different scales, so do not compare a single number without identifying the test. Check which parts of the glove the protection covers.
Use the instructions for your own glove when selecting, cleaning, or replacing it. Ask the manufacturer if the label does not make the intended use or protection clear.
Make the choice before you carve
- Protection information: identify the exact model and check its instructions for the task and the areas protected.
- Fit: with the knife put away, check the fingers, palm, and wrist for a secure fit.
- Control: hold and turn your practice block. If the glove slips or loose material interferes with your grip, try a better-fitting size or model.
- Condition: check the glove before use and replace damaged protection. Follow its own cleaning and care instructions.
Use these checks when choosing gloves for whittling, then keep checking your blade path while you work. Never test a glove by cutting or stabbing it.
Inspect and replace
Check your glove before carving. Replace it if it has holes or damaged areas; exposed skin has no protection from the glove at that spot. Do not keep working in a worn glove like the one below.

Cut-resistant does not mean cut-proof. A sharp carving knife can cut through a glove, especially when pressure is repeated in one place. Never rest the blade against your glove or use it to stop a cut.
Do not copy this demonstration: deliberately cutting a glove is dangerous and damages the protection you need.

A knife tip presents another risk. Do not rely on a glove's cut resistance to stop a pointed blade. Keep the tip away from your hand even when you are wearing protection.

Gloves supplement controlled knife use; they do not make an unsafe blade path safe.
Keep Your Hands and Body Out of the Blade Path
Before each cut, look beyond the part of the wood you plan to remove. Where would the edge go if it slipped or the shaving broke free? Move your fingers, thumb, and body out of that path before applying pressure.
The thumb in front of the knife below is in danger if the blade runs out of the wood. Reposition your hand or turn the piece so the cutting edge and its possible follow-through stay clear of your skin. A glove does not make this hand position safe.

Support the Wood Before Applying Pressure
When cutting wood on a work surface, make sure it rests steadily and has support near the cutting area. Check that pressure from the knife will not tip or move the piece. Keep the hand steadying it clear of the blade. For projects that need a vise or saw, see our guide to holding and sawing a carving blank.

If the wood shifts or loses balance, stop. A moving workpiece can change the knife's direction while you are still pushing. Set the blade clear, reposition the wood, and check its support before continuing.

Stop When the Knife Catches
If the knife stops cutting, do not force it forward. A cut that is too deep or a knot in the wood can create extra resistance. Pushing harder can send the blade farther than intended when the resistance suddenly gives way.

Stop applying pressure. With the wood steady and your hands clear of the blade's path, carefully withdraw the knife while keeping control of it. Do not twist, pry, or yank it free. If you cannot withdraw it in a controlled way, stop rather than forcing it.
Once the blade is clear, reset your grip and take a shallower shaving. Work through the resistant area a little at a time. Use a sharp knife suited to the cut, and follow its manufacturer's instructions. These knife safety guidelines explain why a secure grip and avoiding twisting matter.

Make these checks part of your whittling safety routine: intact protection, a clear blade path, steady support, and a cut you can control. Stop whenever one of those conditions changes. For the movements themselves, continue with basic whittling cuts.