How to Whittle: A Beginner’s Guide to Your First Cuts
Learning how to whittle starts with a piece of wood, a suitable carving knife, and cuts you can control. Whittling shapes the wood by removing small shavings with the knife. This guide takes you from preparing a practice block to making push, pull, and stop cuts, reading the grain, and checking whether you are ready for a shaped project.
Start with the push cut and stop-cut exercises. The pull cut needs additional control because the edge travels back toward the knife hand; work on it only when you can maintain clearance and stop reliably. There is no need to complete every grip in your first practice session.
The basic whittling cuts below work together: push or pull to remove a shaving, and use a stop cut where you need a clear boundary. Learn these whittling techniques one at a time, then combine them in the practice block exercises.
What You Need to Start Whittling
- Practice wood: use a block you can hold securely; basswood is one option. Keep the practice area clear of knots that interrupt the cut.
- Carving knife: choose one suited to the grips below, with a sharp edge and a handle you can control. Our whittling knife guide explains what to look for.
- Pencil: mark where you want a shaving or boundary cut to end.
- Hand protection: use suitable, intact protection without putting it in the blade’s path.
With the blade clear of the wood, decide where the cut will start and end. Check your holding fingers against the entire travel of the blade, then begin with a shallow cut. If the block shifts or you need more force than you can control, stop and reset.
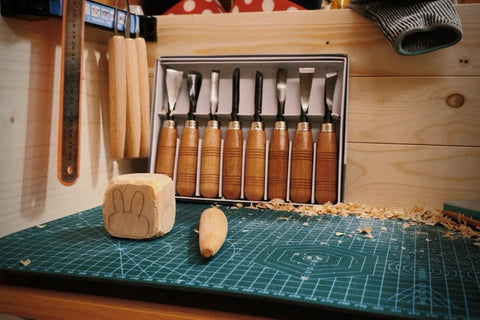
For a beginner, a plain practice block gives you room to learn without protecting a thin ear, arm, or other small detail. Choose wood that you can hold steadily while keeping your fingers clear of the area being cut. A ready-to-use carving blank avoids making a saw cut just to begin these exercises.
You do not need a large set of tools for this practice. Use a sharp carving knife designed for hand carving and the grips shown below. Follow its care instructions; a damaged edge or a handle you cannot hold securely needs attention before you start. See sharpening and stropping a whittling knife for edge care. A pencil is enough to mark the boundaries for the exercises.
Set up before the first cut
Work where you can see the cutting area clearly and keep other people clear of the tool’s reach. Your holding hand steadies the block; your knife hand guides the blade. Keep your fingers and body clear of both the intended cut and the path the knife could take if it slips.
Use suitable hand protection and replace damaged gloves or thumb protection. Cut-resistant protection does not stop every cut and must never serve as a blade stop. Some demonstrations below include worn protection and an exposed thumb; keep your own protection intact and your skin clear of the cutting edge.
For more on glove limits, blade clearance, and supporting the wood, read our carving safety tips.

Use a carving knife designed for these grips. Do not use a thin, segmented utility blade for thumb-assisted pressure. Apply support only to a suitable non-cutting part of the knife or to the knife hand, following the knife maker’s instructions.
Thumb-Assisted Push Cut
Hold the block with your fingers behind and clear of the cutting path. Bring the thumb of your holding hand against a suitable support point on the knife. Use that thumb to move the knife forward through a shallow shaving while your knife hand guides the cut.
Keep the movement short. The pushing thumb supplies the pressure; avoid adding a strong forward drive from your knife hand. Lift the blade clear and reset your grip between cuts.


Keep Your Fingers Out of the Blade Path
Do not copy the finger position below. A finger curled around the front of the block can sit directly in the knife’s path. If the blade runs out of the wood, it can strike that finger. Move your fingers clear before applying pressure.

Another way to support this cut is to push against the thumb of your knife hand. With a suitable carving knife, you can also use its non-cutting spine as the support point. In either grip, keep your holding hand’s index and middle fingers away from the cutting edge and its possible follow-through.


Pull Cut (Paring Cut)
A pull cut, also called a paring cut, brings the knife back in a controlled motion. Change your grip first: hold the knife with four fingers around the handle and brace the thumb of that hand against the block, outside the blade’s travel.

Close your fingers slightly to draw the blade through a shallow shaving. The braced thumb supports the hand while your fingers control the movement. Keep the cut short enough that you can stop it before the edge reaches your thumb. Never use your thumb, skin, or glove to catch or stop the blade.

Practice stopping partway along the surface. Lift the knife clear, choose another starting point, and make another short cut. Control the stopping point with your grip instead of pulling harder to finish the shaving.

A longer shaving requires the same control throughout its travel. If you cannot keep your thumb outside the blade’s path, reposition the block and your hands before continuing.


Stop Cut: Set a Boundary
Use a stop cut when a shaving needs to end at a particular place. For example, a carved fold in a figure’s trousers needs a defined edge rather than a cut that runs straight through it.

First, cut into the wood along the intended boundary to sever the fibers there. Then approach that boundary with a shallow cut from the waste side, removing the wood you do not need. The two cuts meet at the boundary.

Work lightly. A stop cut does not make it safe to force the knife forward, and cutting too deeply can remove part of the detail you want to keep. If the shaving stays attached, deepen the necessary cut a little instead of levering the chip out.


Make a Small Notch with Two Meeting Cuts
To make a small angular notch, cut into the wood from one side, then make a second cut from the neighboring side so the cuts meet. Together they release a small chip and leave a notch. This differs from making the boundary cut alone.

Keep both cuts shallow while you learn how they meet. Clear the chip with the cutting edges, without prying against the wood you want to retain. These notches can help define clothing folds, texture, or a change between surfaces.


Let the Wood Grain Guide the Cut
Think of wood as a bundle of long fibers. A wedge driven between them can split the bundle farther than intended, much as an axe opens a split along a log. Whittling calls for controlled shavings, so watch what happens ahead of the cutting edge.

If the blade starts lifting fibers or opening a split beyond the cut, stop. Try a shallower cut from the opposite direction. Turning the block or changing from a push cut to a pull cut can help, provided it changes the blade’s travel through the fibers and still leaves a clear path for your hands.
Grain can be hard to read, including on basswood. Make a light trial cut and judge the wood’s response: aim for a shaving that separates cleanly rather than tears ahead of the blade. Cutting across or against the grain is not a blanket solution to splitting.

Consider wood grain direction when you lay out a design, remove larger waste areas, or use a chisel as well. It affects how much wood may break away beyond the tool. For these basic wood carving cuts, let the fiber direction and the available hand clearance guide your choice of push or pull.
Practice in a Useful Order
Use one block to practice a shaving, a boundary, and a notch. These are small exercises you can inspect immediately, before starting a figure.
- Shave an edge. Choose an accessible edge with room for your hands. Use shallow push cuts to make a narrow flat surface along it. Lift the knife clear between cuts. Check that the shavings release cleanly and that the block stays steady.
- Stop at a pencil line. Mark a short boundary on an accessible face. Make a shallow stop cut on the line, then remove a thin chip from the waste side toward it. The cuts should meet without carrying the chip through the area you want to keep.
- Make a small notch. In another accessible area, bring two shallow cuts together as shown above. Inspect the meeting point before deepening either side. Release the chip by cutting; do not lever it out.
- Add the pull cut when ready. Practice a short shaving with the braced thumb outside the blade’s travel. Stop before the edge approaches your thumb. If you cannot maintain clearance, return to the push-cut exercise and reset the arrangement.
Read the result and adjust
- Fibers lift ahead of the blade: stop and try a lighter cut from the opposite direction, after checking hand clearance again.
- The chip stays attached: check where the cuts fail to meet and cut there lightly; avoid prying.
- You cut beyond the boundary: shorten the stroke and reduce the depth. A stop cut is a boundary in the wood, not a reason to push harder.
- The block shifts or your grip tires: put the knife down and reset or take a break before continuing.
Your first result can simply be a block with a clean shaving, a defined boundary, and a small notch. The useful progress is being able to explain why you chose each cut and stop it where you intended.
For another demonstration of the grips and cut boundaries, see these carving knife techniques.
Choose Your Next Step
Move on when you can keep the block steady, take a shallow shaving, stop where you intend, and release a chip without levering the blade. Keep practicing any movement that still requires uncontrolled force.
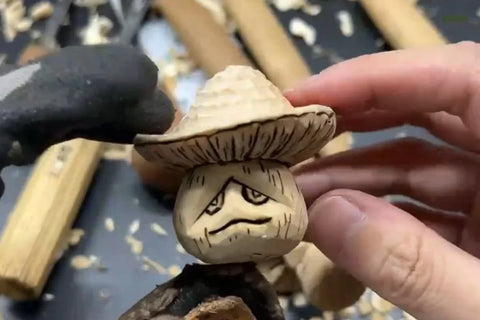
If you want to apply the cuts to a shaped figure and have a vise, saw, and gouges as well as carving knives, try the mushroom wood carving project. Its rounded stem, tilted cap, and gills give you specific shapes to work toward. Read its tool list before starting.
For a broader look at planning and finishing a figure, the beginner figurine-carving guide covers the wider process.