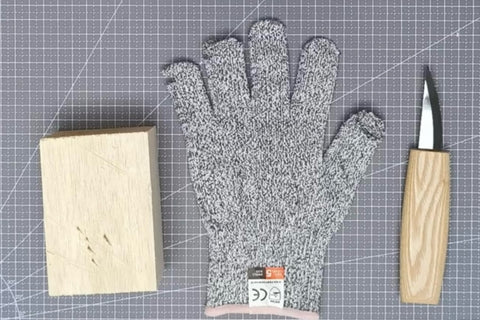
Wood Grain Direction for Carving: Read the Grain and Plan Your Shape
Wood grain direction affects both how a carving cuts and how well its thin parts hold together. Before drawing on a block, follow the fibers across more than one face. Then place the shape so those fibers support its narrow parts, and use small test cuts to check the cutting direction as you work.
The wood blocks and animal figures below show how to make those decisions before a delicate leg or trunk becomes a weak point.

Read the grain on more than one face
Think of wood as a bundle of long cells running mainly along the tree’s length. A block cut roughly along that direction has two opposing end-grain faces, where the cells have been cut across, and four long-grain faces, where you can follow their length. A block’s longest edge is a clue, but it does not prove that the fibers follow it.
Start by turning the block. On the end grain, growth rings may appear as arcs or bands; on the long faces, markings usually extend lengthwise. Small blocks may show only part of a ring, and fine-grained wood can have faint markings, so do not expect every end to look like a complete tree-ring diagram.

Follow a visible line along one long face, then turn the block to an adjacent face. Compare where the markings slope toward an edge, curve, or change direction. Looking from a second side helps you judge how the grain travels through the wood, rather than treating the outline on one surface as the whole story.

Now compare that lengthwise direction with the direction across the block. Across the grain means crossing the fibers. End grain names a surface where fiber ends are exposed; it is not a separate arrow telling you which way to move a knife.


Visible growth-ring patterns are useful clues, but they do not always show the exact fiber direction. If the grain is unclear, the next check is a small cut in waste wood. For a closer explanation of surface patterns and adjacent faces, see Katz-Moses Tools’ guide to reading grain direction.
Let a small test cut guide your next move
A lengthwise grain mark helps with layout; it does not mean every cut should run from the top of the figure to the bottom. The grain may slope within the block, and a curved carving exposes it at changing angles.
Cutting with the grain means approaching the local fibers so they are supported as the edge severs them. A cut that lifts and splits fibers ahead of the edge is working against that support. Simply driving a blade parallel to the grain can also start a split, so aim to cut a small shaving rather than pry the wood apart.
With a sharp tool, make a shallow test cut in an area that will be removed. Look at the surface and watch what happens ahead of the edge. If it cuts cleanly and stays controlled, continue with small cuts. If fibers lift, a split starts, or resistance rises abruptly, stop instead of pushing harder. Reposition the block and your hands, then try a shallower cut from another direction.
Keep checking as the shape changes. A direction that worked on one part may tear on the next. Cross-grain cuts are also part of carving; they sever fibers across their length and need a sharp edge and controlled depth. For the actual knife movements, continue with basic whittling cuts.

If cutting stays difficult in several directions, also check the edge using the whittling knife sharpening guide. Difficult grain is not a reason to force a dull blade.
Place the pattern with the grain in mind
Layout means deciding where the finished shape will sit inside the block. Set the paper profile on a long-grain face, then compare its orientation with the fibers before tracing it. This is the moment to move or turn the design, while all of the wood is still available.

For an upright figure such as this raccoon, running the grain broadly from head to feet can be a useful starting point. It lets the fibers extend through much of the figure’s height. Treat that as a starting check, then look at the smaller parts that project from the body.

The elephant profile makes the tradeoff clearer. Its body, legs, and trunk point in different directions. Aligning the overall height cannot automatically align every part. Trace the intended grain through the legs, the trunk’s base, and its bend; look for places where a narrow section would contain only short lengths of fiber.

If the block has knots, cracks, or strongly changing grain in a part you need to keep, consider a different block or a simpler layout. The wood selection guide explains how to check the individual blank as well as the species.
Protect thin legs and other narrow parts
A thin leg is more vulnerable when the grain crosses its narrow section instead of continuing along it. On this dog, examine how the fibers would run through each leg and into the body. A good-looking outline alone does not tell you whether the connection will hold up.

The two proposed strips below show the difference using the same block. In the lengthwise layout, fibers can continue along the strip. In the cross-grain layout, the strip contains short fiber lengths between its sides, making it easier for a split along the grain to separate the piece.


This is a question of grain orientation and resistance to breaking, not a way to make the wood itself harder. Thickness, defects, and the shape of the connection still matter. Even a part aligned with the grain can break if it is too thin or is forced sideways.
When several fragile parts point in different directions, decide which need the most support. You may need to change the pose, keep a connection thicker, or bring a projecting part closer to the body. Everett Ellenwood’s explanation of grain alignment in carvings shows why a layout sometimes requires this compromise.
Plan the elephant’s trunk before removing wood
A long trunk sticking out across the grain can leave a fragile area at its base or bend. Turning the trunk upward may improve the layout if it allows more fibers to continue along the vulnerable section. The upward pose itself is not a guarantee: follow the grain through the whole trunk, including the point where it joins the head.

Before making the trunk thin, compare three possibilities:
- Change the pose. Adjust the trunk so its most delicate section follows the grain more closely.
- Change the shape. Make the projection shorter or thicker, or keep it closer to the head or body where the design allows support.
- Make a separate part. Carve the trunk from another piece oriented for that part, then join it to the main figure.
A separate part gives you more control over its grain direction, but it also creates a joint that needs careful planning. Do not assume a tiny end-grain contact will be reliable just because it is glued. Plan a well-fitting joining surface and follow the adhesive maker’s preparation, clamping, and curing instructions before loading or carving across the joint. Titebond’s wood-glue guidance explains why end-grain joints and joint design need special attention.
Painting can help blend the appearance of an assembled carving, but it does not strengthen a poor joint or guarantee that the seam will disappear. Decide whether the extra joining work is worthwhile before committing to a separate trunk.
Check the layout, then practice on waste wood
Before removing the outline, make one final pass around the block:
- Find the end grain and follow the lengthwise grain on two adjacent faces.
- Compare the pattern with the actual fibers, especially at legs, tails, trunks, and other narrow connections.
- Change the layout or shape where short grain would leave an exposed weak point.
- Make a small test cut in waste wood, and use its feedback to choose the next local cut.
Keep the work securely supported and your hands and body out of the blade’s travel, including where it could go if it slips. Reposition before changing cutting direction. Review wood carving safety before practicing with a sharp tool.
Start with a simple shape whose grain is easy to follow. Learn to recognize a clean shaving and the first signs of lifting fibers before taking the same judgment to a delicate animal figure.