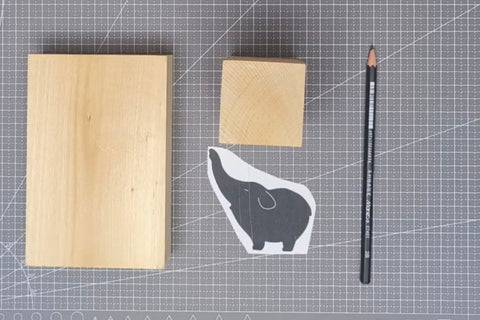
Best Wood for Carving: Choose the Species and Check the Block
The best wood for carving depends on your tools and the finished shape. For small figures made with hand tools, start with clear, straight-grained basswood: it cuts relatively easily, and its fine, even texture supports small details. Balsa can be useful for practicing broad shapes with little cutting resistance, but its very soft fibers can make crisp edges harder to achieve.
Choosing a species is only half the decision. A basswood block with a crack through the figure is a poor choice, even if the label says “carving wood.” Look for sound wood, fairly straight grain, and enough clear material for the whole shape you plan to make.
Choose wood for the cuts and details you need
For knife-carved figures, the best wood for whittling lets you make controlled cuts without having to force the tool. That also means choosing a texture that will hold features such as ears, a nose, or a shallow line. The softest material is not automatically the most useful one.
When choosing soft wood for carving, distinguish cutting hardness from the terms hardwood and softwood. Those names describe biological groups of trees, not a simple hard-to-soft scale. Basswood and balsa are both hardwoods botanically. For a first hand-carved figure, the practical concern is avoiding a hard, dense block that demands more force than you can comfortably control.
Start with basswood if you want one material for both shaping and details. Choose balsa as an optional practice material when the main goal is learning to remove corners and develop a simple silhouette. You do not need to work through balsa before trying basswood.

Balsa and basswood under the tools
These examples show how the two blocks respond during shaping and line cutting. Individual pieces vary, and the edge, cutting direction, and depth of cut all affect the result.
Before cutting: keep your supporting hand out of the tool’s path, use controlled shallow cuts, and follow the hand-protection advice in our wood carving safety guide. Easy-cutting wood still needs a sharp tool and a secure grip.
Balsa: easy shaping, less support for crisp details
Balsa offers very little resistance in this example. A small strip can be pulled from the edge by hand, and the knife removes a corner readily. That makes it useful for exploring a broad form, but the same softness leaves delicate edges easy to damage.


Look at the surface after the cut. Some fibers remain rough instead of leaving an even facet. A dull edge can worsen tearing or crushing; pushing harder is not the remedy. Check the edge and take a lighter cut in a direction that leaves the fibers better supported.

The narrow grooves below show the limitation more clearly: their edges break up in this piece of balsa. You can carve marks in balsa, but clean, narrow lines are less forgiving than broad shaping. Do not judge your control only by how neatly this material holds a tiny detail.

Basswood: a useful balance for small figures
The basswood block gives a cleaner result in these demonstrations. Its finer, more uniform texture supports smooth facets and small grooves, which is helpful when you move from the overall shape to facial features or clothing lines.


If your basswood cuts look furry or tear out, check the sharpness of your whittling knife, change the cutting direction, and reduce the amount removed at once. Good material makes learning easier, but it does not remove the need to read the grain.
Other woods to consider
Consider another species when basswood is unavailable or when a different grain pattern suits the finished piece. Match the actual block to the project instead of assuming that every piece sold under the same name will cut alike.
- Aspen: a light, soft option for small carvings. It is a reasonable alternative to try when you can get a clear block; make a few shallow cuts before committing to fine features.
- Butternut: useful when you want visible grain as part of the finished figure. It is generally easy to carve, but its coarser texture gives a different surface from basswood. Woodcraft’s guide to carving woods discusses that combination of easy cutting and pronounced texture.
- White pine: an option for simple whittled forms when you can find a clear piece. Avoid knots and resin pockets, and check how the grain cuts before planning delicate lines. Schaaf’s beginner wood guide includes white pine among its carving choices.
If a seller calls a board simply “poplar,” ask which species it is. Quaking aspen is sometimes called poplar, while yellow-poplar is a different tree. A shared common name is not enough to predict how a block will carve.
Check the whole block before carving
Turn the block over and inspect both ends and all four sides. Good wood to whittle should give you a sound, clear area for the entire figure, including any thin parts. Precut, dried blocks still need this check.
Cracks: look beyond the visible opening
A crack can separate a part just as you finish shaping it. Check the ends especially carefully, then follow any visible split onto adjacent faces. If it enters the wood you need to keep, or you cannot tell how far it runs, choose another block.

A defect near an edge may fall in the waste, but a pencil outline on one face does not prove that. Consider the front, side, and full depth of the figure. Only keep a smaller piece when the defect can be removed completely and the remaining wood is clearly sound; recheck the newly exposed surface before carving.
Knots and uneven grain: allow for changes in direction
Knots interrupt the surrounding grain and can make cutting unpredictable. For a first small figure, choose a block without knots in the retained shape. A knot outside the finished form may be removable, but do not place a narrow neck, wrist, or other thin section beside a questionable area just to save wood.
The irregular grain in the block below is another reason to choose carefully. Changes in fiber direction can require frequent changes in cutting direction. A straighter-grained piece gives a beginner fewer competing problems to solve.

Dark streaks and decay: appearance alone is not a diagnosis
Dark marks can come from several causes, including natural color variation, staining, or fungal activity. A photograph cannot tell you whether the wood is structurally sound. The streaks below are a reason to inspect the block, not proof that all the dark wood is rotten.

Staining and decay are different problems. Purdue Extension’s discussion of blue stain explains that this discoloration differs from structural decay. Decay attacks the wood’s structure and can be less obvious than its eventual color or texture suggests. For a beginner’s carving, pass over blocks with suspected decay, crumbling areas, or unusually soft, spongy patches. Do not treat visible discoloration as a reliable boundary for cutting away all damaged wood.
Saving an otherwise sound offcut can be sensible. Trying to rescue uncertain, deteriorated wood for a small figure usually adds difficulty without giving you a dependable starting point.
Where to buy wood for carving
Look for carving suppliers, woodworking stores, or hardwood dealers that identify the species and sell clear, dried blanks. Craft stores can be useful for small practice blocks; a lumber dealer may offer larger pieces that need cutting to size. Ask about preparation rather than relying on the word “craft” or “carving” on the label.
When buying whittling wood blocks, check:
- Species: the actual wood name, rather than an unspecified assortment.
- Condition: dried material with clear faces and ends, without splits, knots through the useful area, or suspected decay.
- Dimensions: enough length, width, and thickness for the pattern, plus the waste needed during shaping. Check the side view as well as the front.
- Preparation: whether the block is ready to carve or needs sawing, and whether photos show the supplied pieces or only a representative bundle.
If you need to saw a larger piece into a blank, plan how to hold it securely. Our beginner carving tools guide covers saws, a vise, and cutting an outline with room left for shaping.
Dry wood, green wood, and soaking
For a small indoor figure, dried, precut wood is the straightforward starting point. Freshly cut, or green, wood can be carved, but it still has moisture to lose. Its dimensions can change during drying, and checking or distortion can affect the shape. Oregon State University’s guide to wood and moisture explains how wood shrinks and swells as its moisture content changes.
Should you soak wood before whittling? You do not need to soak a sound basswood blank as a routine first step. Wetting is not a substitute for a suitable species, a sharp edge, and a manageable cut; the added moisture must also leave again. If a dry block is difficult to cut, check the edge and grain direction first, take smaller cuts, and change material if it still requires excessive force.
Plan the grain before the first cut
Before drawing the figure, follow the grain along neighboring faces and check the ends. Visible color bands alone do not tell you every change in fiber direction. Where the shape allows, keep fibers running along slender parts rather than placing those parts across short, easily separated fibers.
Then make a shallow test cut in wood that will become waste, with your supporting hand clear of the path. If the fibers lift or split ahead of the edge, stop and reassess the direction and cut size. Our basic whittling cuts guide explains the next steps in controlling the cut.
Choose a block that suits both the tool and the finished shape. For most first figures, that means clear, straight-grained basswood, checked on every side before the pattern goes on.