How to Choose a Whittling Knife: Shape, Size, Steel, and Grip
A whittling knife should feel manageable in your hand and suit the cuts you want to make. For small wooden figurines, start by comparing a straight cutting edge, a blade size you can control, and a comfortable handle. Then consider the steel and edge geometry together: the material name alone will not tell you how a knife cuts.
A wood carving knife removes wood through hand-controlled cuts. Whittling knives belong to that family; the names often overlap. Here, the focus is on choosing a knife for shaping wood, rather than a kitchen carving knife.
Start With What You Want to Carve
Picture your next project. Will you be shaping broad surfaces, reaching into small details, or making shallow concave textures? A knife that works well for one of those jobs may be awkward for another. Even after excess wood has been sawn away, shaping a small figurine can involve both substantial cuts and delicate adjustments.
Use six questions to compare your options: Can it remove wood efficiently? Does it cut without excessive effort? Can you place the edge accurately? Will you be able to sharpen it? Does it hold a useful edge? Is the handle comfortable? There is no single feature that answers all six.
If you are choosing a whittling knife for beginners, we recommend starting with one general-purpose, fixed-blade carving knife that fits your hand. For the small figurines discussed here, a straight edge is a useful starting point. Add a specialized knife when a particular shape or detail gives you a reason to do so.
Match the Blade Shape to the Cut
Before trying cuts, review wood carving safety and hand protection. Keep hands and your body out of the blade’s path, including where it could go if it slips. Do not touch the cutting edge to compare knives; gloves and thumb protection do not make an unsafe blade path safe.

Straight and curved blades
Look at the cutting edge itself, as well as the overall blade profile. A curved outline does not tell you everything about the part of the edge that will meet the wood.


For our small figurines, we prefer a straight edge as the main carving knife. It helps us place cuts on flat faces and make controlled adjustments. A curved edge meets the surface differently and may call for a different hand position as you follow the shape. Straight does not automatically mean faster or easier in every cut; the wood, edge condition, and way you use the knife matter too.
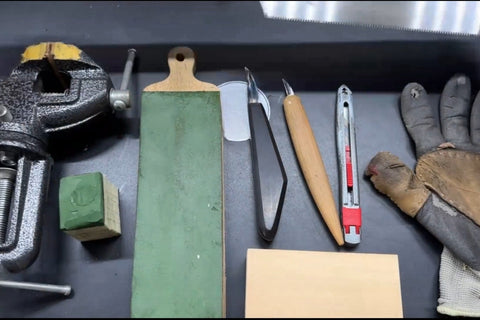
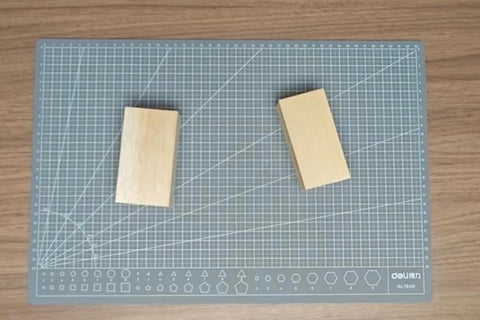
Compare how these blades meet the same marked block. When choosing your own knife, think about whether you can reach the intended surface while keeping a comfortable, controlled grip.


Detail and concave work
For fine details, consider whether the tip can reach the area without the rest of the blade getting in the way. For shallow hollows and recessed textures, a curved, pelican-style carving knife can be useful. Choose it for that specific access need rather than expecting it to replace your main knife.


Pelican-style knives and hook knives are not interchangeable names for every curved blade. If your project needs a deep hollow, check the tool’s intended use and cutting profile before buying.
Choose a Blade Size You Can Control
For the 5–15 cm (about 2–6 inch) wooden figurines we make, blades around 3.5–5 cm (about 1⅜–2 inches) long have been a useful working range. They let us shape larger areas and make some small adjustments with the same knife. Treat this as a starting point from our work, not a required size for every project or hand.
Compare the blade with the space you need to reach. A larger knife can be useful for rough shaping, while a smaller detail knife may give you better access in a tight area. Neither the overall height of the carving nor blade length alone tells you which knife will be easiest to control.
You do not need to buy both at once. Start with a manageable general-purpose blade. If its tip or profile repeatedly prevents you from reaching a detail, you will have a clearer reason to add a second knife.
Check the Handle and Knife Construction
Handle fit
When you can try a handle, keep the edge safely covered and compare how it sits in the grips you intend to use. Check whether you can hold it securely without squeezing hard, whether any corners press into your palm, and whether your fingers crowd the blade. A handle that feels good in one grip may feel awkward in another.
When shopping online, look for handle dimensions and clear views from several sides. Consider the handle separately from blade length: a short blade does not have to mean a small handle. The Morakniv guide to carving knife shapes and handles can help you compare those features.
Fixed blade or folding knife
A fixed blade avoids a folding joint and is our suggested starting point for this kind of small-figurine work. It still needs an appropriate edge cover or sheath when stored.
A folding whittling knife can be convenient to pack, but check its opening and closing mechanism before choosing it. Some carving folders lock open and others do not. Read the instructions for the exact model, including how to engage and release any lock. Do not assume a lock is present, or that a locked blade cannot fail. If the mechanism or grip feels uncertain, choose a different knife.
Balance Steel Properties and Maintenance

Hardness, toughness, and edge retention describe different properties. Hardness concerns resistance to permanent indentation or deformation; toughness concerns resistance to fracture; edge retention concerns how well cutting ability lasts. Steel composition, heat treatment, and blade geometry work together. More carbon, a higher hardness number, or a “high-speed steel” label does not by itself make a better carving knife.
Non-stainless carbon steel needs attention to rust prevention. Stainless steel offers corrosion resistance, but still needs care. “High carbon” does not necessarily mean non-stainless. Choose using the maker’s actual material and maintenance information. For a closer look at the tradeoffs, see steel properties and edge geometry.
Do not treat difficulty sharpening as proof of quality. Wear resistance can affect sharpening, but your abrasives and the condition of the edge matter too. Ask what maintenance tools and method the maker recommends. For step-by-step edge care, see our guide to sharpening and stropping a whittling knife.
Keep the blade clean and dry before putting it away, especially after sharpening with water. Follow its care instructions for any rust protection. Choose a maintenance routine you can keep up with; a promising steel label is little help if the knife is left dull or damp.
Understand Blade Thickness and Bevels
Cutting ability and edge support
Blade thickness describes the body of the blade. The bevel is the sloping surface leading toward the cutting edge. Edge angle describes how the two sides meet at the edge. These are related features, but a thick blade does not automatically have a large edge angle, and blade length does not tell you its thickness.


In our small-figurine work, thinner blades have often felt easier to cut with. That experience is about cutting ability, not simply sharpness. A well-sharpened edge can still feel difficult to push through wood if the geometry is poorly suited to the cut.
A more acute edge has less support and can be more vulnerable to damage. The useful balance depends on the knife and the work; the thinnest edge is not automatically the best choice. Knife-edge toughness testing explains why geometry matters to edge damage.
If a specification lists an angle, check whether it means the angle on one side or the total, inclusive angle. For your first knife, choose geometry intended for carving and maintain it as directed. Experienced carvers may reshape an edge for a particular task, but grinding a new knife thinner adds a separate sharpening job and can weaken it. Do not pry or twist a blade in the wood.
Single- and double-bevel edges
A single-bevel blade has its main bevel on one side, with the other side generally flat. A double-bevel blade has bevels on both sides. This describes the faces leading to one cutting edge; it does not mean the knife has two cutting edges.


Both layouts are used for carving. Do not assume they handle identically or that one is always easier to sharpen. For an asymmetric blade, check any right- or left-handed designation and its intended use. Follow the maker’s sharpening instructions rather than treating one side as a bevel it does not have.
A Practical Checklist Before You Buy
- Project fit: Can the blade shape do the broad shaping, details, or shallow hollows you need?
- Size and access: Can you place the tip where the cut belongs without the blade body getting in the way?
- Grip: Can you hold the handle comfortably and securely in your intended grips?
- Edge and maintenance: Does the seller describe the edge condition, and does the maker explain how to keep it sharp and protect it from rust?
- Construction and storage: Is there a suitable cover for a fixed blade? For a folder, do you understand its mechanism and any lock?
- Condition on arrival: Check for visible damage and loose parts before use. Ask the seller about a problem rather than trying to compensate with extra force.
Favor a knife you can control and maintain over one chosen for a single impressive specification. Efficient cuts, manageable effort, and accurate placement should work together with comfort and a useful edge.
Three Knives to Compare by Task
These three Flexcut models illustrate different blade shapes and uses. The descriptions draw on manufacturer specifications, not our own comparative tests.
- General shaping: The Flexcut KN12 Cutting Knife has a rounded point and a listed blade bevel length of 1¼ inches. Consider it as an option for your first general-purpose carving knife.
- Narrow detail cuts: The Flexcut KN13 Detail Knife has a fine point and a straight blade, with a listed 1½-inch blade bevel. Its longer bevel shows why tip shape and access matter alongside length.
- Shallow hollows: The Flexcut KN18 Pelican Knife combines a curved blade with a narrowed point; its listed blade bevel length is 1⅝ inches. Compare this profile when a straight blade struggles to reach a concave surface.
Choose one suitable main knife first. Add a specialized profile only when your project needs it, and apply the same handle-fit and maintenance checks to each model.
After You Choose Your Knife
Learn its care and handling instructions before starting a project. An ordinary pocket knife is not automatically suitable just because it can cut wood; judge its blade shape, handle, edge, and mechanism against the same checks. For the rest of your setup, see our beginner wood carving tools guide.
Once your knife and workspace are ready, use our guide to your first whittling cuts to begin controlled practice. That will help you learn what your knife does well before you decide whether another blade would add something useful.