Mushroom Wood Carving: From Block to Textured Figurine
This complete mushroom wood carving project shows how to carve a mushroom from wood, beginning with a square blank and ending with a shaped cap, radiating gills, a scalloped surface texture, and a simple face. This design has a tilted cap and an off-center crown, so the goal is not perfect symmetry. Instead, you will use reference views, layout lines, and frequent visual checks to keep the shape balanced as it changes.

This is a useful next project once you can make small, controlled knife cuts. The tilted rim, hollow transitions, and textured cap give you more to practice than a basic cap-and-stem shape. The process uses a vise and a compact Japanese pull saw for the roughout, straight and curved carving knives for shaping, gouges for the shallow underside and surface texture, and an optional pyrography pen for darkening the final lines. Work slowly, keep the cutting path clear, and treat each image as a checkpoint rather than an invitation to remove the same amount of wood from every side.
Before starting, practice the basic whittling cuts and review carving-knife safety. You should be able to release a thin shaving and stop at a marked boundary while keeping your holding hand clear of the blade.
How to Carve a Mushroom from Wood: Project Overview
What You’ll Make
The finished piece is a small wooden mushroom figurine with an uneven, characterful cap. One side of the rim sits higher than the other, the crown rises away from the geometric center, and the stem is adjusted visually to balance the unequal cap overhang. Under the cap, narrow V-grooves radiate toward the rim. Overlapping shallow cuts form a fish-scale-like texture on top, and pencil and optional woodburning add the face and darker line work.
This mushroom carving ends after the optional woodburning step. Sanding, sealing, oiling, painting, and other surface-finishing processes are outside the scope of this tutorial.
From a Whittled Mushroom to a Detailed Carving
If you have made a simple whittled mushroom, this project builds on the same cap-and-stem form. Here, a saw removes the larger corners and gouges shape the underside and surface texture. Check that you have those tools before choosing the design; the knife cuts are one part of the full process.
Choose the Shape and Details
When planning carved wooden mushrooms, the cap and stem proportions set the character before any texture is added. Decide on the silhouette before drawing the layout. A broad cap needs a wider blank, while the cap height and stem length set the proportions you will carry around its faces. For this mushroom, keep the sloping rim and raised crown visible from the side, then turn the piece to check how the stem balances beneath them.
Settle the shape before adding surface detail. The radiating gills emphasize the underside, the overlapping gouge cuts give the cap its scalloped texture, and a simple face turns the mushroom into a character. Test the texture on scrap before committing to it. Choose the expression in pencil after carving; darkening it with a pyrography pen is optional.
Project Dimensions
These measurements describe this particular mushroom layout. They are not universal mushroom proportions.
| Layout detail | Measurement |
|---|---|
| Square section used for layout | 5 cm by 5 cm |
| Center of each 5 cm face | 2.5 cm from either edge |
| Designed figurine height | 8 cm |
| Cap portion of the layout | 4.5 cm |
| Stem portion of the layout | 3.5 cm |
| Starting blank length | Longer than the 8 cm design; trim the excess after transferring the layout |
Important: the measurements above do not mean that the starting blank should be 5 × 5 × 8 cm. Begin with a blank longer than the 8 cm design, transfer the layout, and then remove the excess length.
Tools and Safety
| Tool or material | Purpose and safe-use boundary |
|---|---|
| Reference image, pencil, ruler, and a try square or another edge-referencing marking guide | Measure the design, draw centerlines, and mark the waste. Use a try square or another edge-referencing marking guide to repeat the same offset across faces. |
| Bench vise | Hold the blank during sawing. Clamp the work securely on a stable surface before beginning a cut. |
| Compact Japanese pull saw | Crosscut the blank, remove the large stem-side waste, and cut the square cap section to an octagonal roughout. |
| Straight carving knife | Round the roughout, establish the cap–stem junction, and cut the gill grooves. |
| Curved or pelican-style carving knife | Reach the tighter, hollow transitions around the cap and test a different surface mark. Never force the tip sideways or use the knife as a pry bar. |
| Carving gouges and scrap wood | Hollow the underside shallowly and compare texture marks before cutting the cap. |
| Cut-resistant carving glove and leather thumb/finger guard | This demonstration uses both a cut-resistant carving glove and a leather thumb/finger guard. They reduce exposure to an accidental cut, but they do not make it safe to place the holding hand in the expected path of the blade. |
| Pyrography pen, optional | Darken the carved grooves and facial details after the carving is complete. Follow the pen manufacturer’s instructions and provide adequate ventilation. |
Before every knife cut, picture where the blade will finish if it slips or passes through the wood. Keep the fingers and thumb of the holding hand outside that path. If a blade begins to bind, scrape, chatter, or make an unusual sound, stop. Change the angle or take a shallower cut instead of forcing the edge.
Step 1: Choose and Size the Wood Blank
For a first attempt at this design, choose a clear, dried basswood blank with room for the full cap and stem. Its fine, even texture makes it a practical material for these details. Inspect the ends and sides for cracks or knots in the wood you plan to keep; our guide to choosing whittling wood explains what to check.
Use the Cap Width to Choose the Square Section
Begin with a mushroom reference you created or have permission to use. Front, side, and top views are the most useful because they show how the form changes around the piece.

If you have only a front view, this specific design can still be laid out because its side profile is similar to its front and the cap is roughly circular from above. Do not treat that shortcut as a rule for every carving. A more asymmetric subject may require separate views.

Measure the mushroom at its widest point, which is the cap in this design. That width determines the minimum square section of the blank. A circular top view can fit inside a square whose width matches the intended cap diameter.
Choose the section before the length. A long blank can be shortened after the layout is drawn, while a short blank cannot be extended without changing the material arrangement.


If the available stock is too thin, laminate two boards face-to-face with woodworking glue to build the required thickness. Do not rely on a simple end-grain-to-end-grain joint for this purpose; see Titebond's guide to gluing end grain if end grain cannot be avoided. This option applies only when preparing the blank.
Measure the Height and Transfer the Design
Once the section is large enough for the cap, measure the reference at both its widest and longest points. Transfer those limits to the wood before deciding what to cut away.

Use a ruler to carry the measurements onto the blank. At this stage, the marks are layout references, not finished curves.

Check the first transferred marks against the reference image. The next step will extend them around the blank so the design can be read from more than one face.

Step 2: Draw the Centerlines and Waste Areas
Mark the 2.5 cm Center on the 5 cm Blank
The example uses a 5 cm square section. Measure 2.5 cm from an edge to locate the center of each face, then draw horizontal and vertical centerlines.

A ruler works for these marks. You can also use a try square or another edge-referencing marking guide to repeat the same offset on several faces.

Extend the centerlines to all four long faces because the blank will be cut and viewed from every side.

Recheck that the lines meet consistently as you turn the blank. During rough sawing, focus on the large straight-sided waste areas. The hand saw cannot follow the final rounded cap, so leave those curves for the carving knives.

Lay Out the 4.5 cm Cap and 3.5 cm Stem
The finished design is 8 cm tall. Assign 4.5 cm to the cap portion and 3.5 cm to the stem portion. This places the cap–stem junction slightly below the midpoint of the design.

Draw the cap–stem junction around all four long faces. Then measure the narrower stem from the reference and shade the wood beside it. The shaded regions are waste, which makes the saw plan easier to read at a glance.

Carry the waste marks around the blank and onto the bottom. Draw the roughly circular footprint of the stem on the bottom face as another cutting reference. Pause and compare every face before moving to the saw: removing wood is irreversible, while a layout line can still be corrected.

Step 3: Rough-Saw the Mushroom Blank
Start the Kerf and Crosscut the Length
Before clamping the blank, turn it through the marked faces and check that the cap, stem, and waste lines agree from one side to the next.


Clamp the marked blank securely in the vise on a stable work surface. Begin by removing the extra length above the top of the 8 cm design.

Place the saw on the crosscut line and use light, controlled pull strokes to establish a shallow kerf. Let that groove guide the blade before increasing the stroke.


Keep the compact Japanese pull saw upright and aligned with the marked plane. The purpose of this crosscut is only to remove excess length, not to shape the cap.
As the cut approaches the far side, reduce pressure. Support the waste and allow the remaining fibers to separate without forcing the final stroke, which helps avoid cutting past the line or tearing the edge.

Check the shortened blank before moving on to the stem-side waste.

Saw Away the Stem Waste
Reposition and secure the blank. Saw vertically along the boundaries of the shaded waste beside the stem, staying outside the intended form. These cuts remove the largest blocks that would be inefficient to pare away with a knife.

Keep the blade vertical and aligned with the layout line so the cut does not drift into the stem.
Turn the Square Cap into an Octagonal Roughout
Use the centerlines and the circular cap outline on the end-grain face to locate the four square corners that remain outside the cap.

Clamp the blank again and saw off those corners outside the circle.

The result is an eight-sided cap roughout and is intentionally blocky. Sawing has removed bulk waste; it has not produced the final mushroom surface.

Put the saw aside before switching to the carving knives. This demonstration uses both a cut-resistant carving glove and a leather thumb/finger guard. They reduce exposure to an accidental cut, but they do not make it safe to place the holding hand in the expected path of the blade. If these knife movements are new to you, review push cuts, stop cuts, and grain response before continuing.

Step 4: Round the Roughout and Establish the Cap–Stem Junction
Take Thin Cuts and Check the Whole Shape
Start with the rough-sawn edges and use small, controlled push cuts to remove thin slices rather than deep chunks. The first goal is to turn the polygonal blank into a readable cap-and-stem form without cutting away the contour lines you drew.

Work from an edge, then rotate the roughout and take another controlled cut. Grain direction changes as the piece turns. If a cut begins to lift fibers or resist, stop, rotate the work, and approach that area from a more favorable direction instead of driving farther into the grain.


Compare the carving with the front contour after every few cuts. Look at the entire silhouette as well as the local facet you are removing.


Round the cap gradually, then use the same small-cut approach on the lower part of the blank. Keep enough wood at the stem for later balancing.


As the cap becomes rounder, examine how its edge meets the stem. Near that junction, the cap should draw inward rather than descend as a straight vertical wall.


Turn the piece again and continue around the junction, keeping the overall volume in view. Develop the inward turn a little at a time; do not try to finish it with one deep cut.

Use a Stop Cut at the Junction
Make a stop cut where the cap–stem transition needs a crisp limit. This cut severs the fibers. Then pare toward it with small, controlled push cuts so a small wedge or chip releases at the line instead of tearing beyond it.

Repeat the stop-cut-and-pare sequence around the junction. Aim for cleanly released chips. Leaving a small splinter after every pass can create a ragged band that becomes harder to clean as the cuts accumulate. Stop periodically, turn the mushroom through a full view, and decide where the junction still needs to move inward.

Step 5: Set the Tilted Cap and Off-Center High Point
Draw the Sloping Cap Lines
Compare the rounded roughout with the reference. In this design, the cap rim is not level: one side rises higher and the other sits lower. Lightly draw the sloping edge you want to preserve.


The pencil line is a guide, not a demand to reach the finished surface immediately. Cut toward it in thin passes and leave a little wood for correction.

Some cuts now cross end grain instead of traveling with the long grain. The resistance is greater because the edge is cutting across the fibers; the wood has not suddenly become denser. Reduce the size of each cut and keep checking the sloping profile.


Flatten only the areas indicated by the layout, and remove the remaining saw marks without erasing the high and low sides of the cap. Keep your thumb out of the return path of the knife even when wearing a glove.


Work Across the End Grain Without Losing the High Point
Return to the side reference and identify the cap's highest point. In this design, it sits a little above the middle of the cap's side profile and is not at the geometric center of the blank. From that high point, the profile draws gradually inward toward the midsection, while the raised crown leans to one side rather than dropping straight down. Mark that high area and the intended curve on the side profile.


Then study the top view. Draw a rough circle offset toward the intended high side, using it to show which surrounding areas must tuck inward.


Carve toward the new lines while protecting the marked crown. Work deliberately, but continue to pause and compare the front, side, and top views. Confidence here means committing to a controlled cut, not removing so much that the layout cannot be adjusted.

As the facets close in, watch the tilted rim and the offset top together. Refining only one view can pull the other out of balance.
End this stage with a clearly offset high area and enough material left for the compound curves that surround it.

Step 6: Refine the Cap, Thin the Rim, and Blend the Curves
Use Four Visual Height Points
Use the reference to identify four visual levels around the cap: the highest, second-highest, third-highest, and lowest visual points. They are checkpoints for this design, not a reusable numerical formula.

Trim the excess above the intended profile so one side descends toward the lower rim. Preserve the raised, marked crown and form inward transitions around it.

A straight blade has limited clearance in those tighter transitions. Use it only where it can travel without being forced, and prepare to switch to a curved blade for the hollow areas.

Switch to a Curved Knife for the Hollow Transitions
With a pelican-style or other upswept curved carving knife, use controlled slicing or pull strokes from the outer area toward the crown. The curve provides clearance where the back of a wider straight blade would contact the surrounding wood.


Follow the intended path of the edge and let a thin shaving release. Do not force the blade to dig sideways or pry out a chip; that loads the cutting edge in a direction it was not meant to take.

Look again at the lowest rim. Protect any area that is already close to the intended profile, while lowering only the nearby upturned areas that still look thicker.


Compare both sides before cutting. If the cap still reads as too thick, reduce the heavy zones without cutting through the thin rim.

Continue narrowing the form from the perimeter toward the crown. Use a curved or narrower carving blade that can reach the area without its spine binding against the wood. A pelican knife uses a curved blade for slicing in hollow areas.

If the cut starts to scrape, bind, chatter, or produce an unusual sound, stop and inspect the contact. Change the approach angle or take a thinner, shallower shaving. A sound is a prompt to reassess the cut; it is not proof by itself that the blade has been damaged. If the edge itself needs attention, stop shaping and follow our guide to sharpening a whittling knife before continuing.


Blend the Remaining Facets
Compare the developing cap with the reference, but keep the character of your own piece if you intentionally changed the silhouette. Blend the hard ridges between neighboring cuts until the crown and surrounding transitions read as one rounded form. Do not chase perfect symmetry; the raised rim and offset crown are part of this mushroom's design.

Step 7: Hollow the Underside and Rebalance the Stem
Carve Only a Shallow Concavity
Turn the carving over and inspect the cap thickness. The upper profile is already set, but the underside can still be reduced where the cap looks heavy. Compare the whole form with the reference before choosing the next cut.


The underside needs only a shallow concavity. A narrow or curved knife can reach parts of this area, while a carving gouge offers a different way to remove wood from the hollow.

Whether the carving gouge has a palm handle or a longer handle, the curved cutting edge—not a flat chisel profile—does the hollowing.

Remove a little wood, then turn the mushroom over and recheck the top. The intention is a subtle inward curve rather than a deep bowl.


Check Front-to-Back Thickness and Visual Centering
Inspect the cap from the front and back. If some areas are already thin while the back remains heavier, protect the top height and remove the excess from below.

Work from the underside toward the heavier zone, then stop to compare again. Wood can be removed from a thick area, but it cannot be put back after the cap has become too thin.

Turn the carving to the side and check the lower silhouette. Soften any hard facets. Because the cap projects farther on one side, the stem may appear off-center beneath it; pare the fuller side only as needed to restore visual balance.

Check the stem through its middle. If it is still too full, pare only the high spots, then look again before removing more.

Now check the same adjustment from the front and side rather than judging the stem from only one view.

Continue to remove only what is visibly too thick through the stem's middle, then round the last hard facet lines.

When the cap thickness, stem balance, and overall posture look settled, stop shaping and move to the underside layout.

Mark the Radial Gill Guides
Use a pencil to divide the underside of the cap and sketch guides that radiate from the area around the stem toward the rim. They can vary slightly; a natural mushroom does not need a mechanically perfect pattern.

Check that the guides describe the underside sectors and the direction of the future gills. They are not merely another cap–stem boundary line.

Step 8: Carve the Radiating Gills
Use Two Converging Cuts for Each V-Groove
Start a gill with a straight carving knife. Follow one penciled radial guide from the stem area toward the cap rim.

Make a second cut that converges with the first. The two cuts release a thin wedge of wood and leave a narrow V-groove rather than a single incised line.

Repeat the two-cut sequence along the underside. Keep the cutting hand controlled and the holding hand away from the path that exits the groove.

Vary the Width and Depth Naturally
If every gill has exactly the same width and depth, the result can look rigid. Keep using the straight carving knife for the two-cut sequence, varying the depth and spacing a little between grooves. Preserve the radiating direction as you work around the underside.

Continue the converging cuts into the tighter area near the stem, then turn the piece to compare the spacing and depth around the whole underside.

Step 9: Test and Add the Fish-Scale-Like Cap Texture
Before choosing the top texture, compare the two trial caps below. Their different surface effects show why the cutting edge should be tested before it touches the mushroom.

Compare Gouge Widths and Sweeps on Scrap Wood
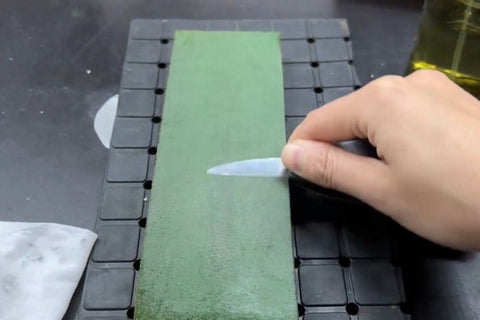
Do not begin the cap texture with an unfamiliar tool. Lay out the available gouges and curved knives, then test each cutting edge on scrap wood and compare the mark with the scale of the mushroom.


The first test uses a 5 mm-wide carving gouge. It leaves a small rounded mark.

A second gouge with a similar curve produces a similar-looking cut. In carving-tool terms, the curvature is the sweep, while the span of the cutting edge is its width.

Next, compare the wider gouge stamped PFEIL D8/7: No. 8 sweep and 7 mm cutting-edge width. Its broader cutting edge leaves a larger mark.

Finally, test the shallow-sweep gouge. Because its curve is more open, its impression is subtler than the deeper rounded cuts in the preceding tests.

| Test tool | Scrap-wood mark |
|---|---|
| 5 mm-wide carving gouge | Small rounded mark |
| Second gouge with a similar sweep | Similar overall mark |
| PFEIL D8/7: No. 8 sweep, 7 mm cutting-edge width | Broader texture mark |
| Shallow-sweep gouge | Shallower, subtler impression |
Try a Pelican-Style Curved Knife
Also test a pelican-style curved carving knife on the scrap wood. Its upswept blade supports a slicing action in hollow or tight areas, but it does not have the U-shaped cross-section of a gouge and should not be described as one. It creates a softer, shallower cut here; a larger curved blade removes a correspondingly larger chip. The scrap test tells you whether that mark suits the scale of your cap.

Build the Texture in Overlapping Rows
After choosing the gouge mark that fits the piece, cover the cap with shallow cuts arranged in offset, overlapping rows. The result resembles small fish scales or scallops. Keep the spacing slightly irregular so the surface remains lively rather than looking stamped by a machine.

Step 10: Add the Face and Optional Pyrography
Draw the Eyes and Facial Details
Once the carved texture is in place, use a pencil to place the eyes, nose, and any other simple facial details. Choose the expression freely; it does not need to copy the example exactly.


Darken the Carved Lines with a Pyrography Pen
Pyrography is optional. If you choose to use it, follow the pen manufacturer’s instructions, provide adequate ventilation, and return the hot handpiece to its stand whenever it is not touching the work. Trace the selected gill grooves and facial lines with the wire-tip woodburning pen to add depth and darken the recesses. You can also use the hot tip to clear tiny loose fibers along those carved lines.

Final Mushroom Carving Reveal
At this point, the shaping, gills, cap texture, face, and optional burned line work are complete. The image below presents the finished carving from the front. No sanding, sealing, painting, or oiling is included in this tutorial.

Like mushroom characters as well as carving them? Our Hypno-shroom Wooden Figure is a finished Plants vs Zombies character for your desk or shelf.
Troubleshooting the Shape
The Cap Is Too Thick
Check the cap from the front, back, side, and underside before making another cut. If the top profile is already at the intended height, remove only the visibly heavy wood from below. Protect any rim area that is already thin. Take a small cut, turn the piece, and compare again.
The Stem Looks Off-Center
First compare the cap overhang on both sides. An intentionally offset crown or a longer overhang can make a centered stem look displaced. Refine the visually heavy side of the stem gradually, judging the balance of the whole mushroom rather than measuring the stem alone.
The Grain Tears or the Blade Starts to Bind
Stop instead of pushing harder. Rotate the work and change the direction or angle of approach, then try a thinner, shallower cut. Across the end grain, expect more resistance and reduce the cut accordingly. If the blade chatters or its spine contacts the surrounding wood, move to a narrower or curved blade with better clearance rather than levering the edge.
The Cap Texture Looks Too Regular
Return to scrap wood and compare the marks from different widths and sweeps. On the cap, vary the spacing modestly and offset the shallow cuts in overlapping rows. Aim for a fish-scale-like texture rather than a set of identical measured tiles.
Mushroom Wood Carving FAQ
Can I try this after whittling a simple mushroom?
If you can already control small cuts around a cap and stem, this project lets you practice a tilted cap, hollow transitions, gills, and gouge-cut texture. Have the tools for each stage ready: a vise and pull saw for the roughout, carving knives for shaping and gills, and gouges for the underside and cap texture. Practice unfamiliar cuts on scrap before using them near the thin rim.
What size is this mushroom?
The layout uses a 5 cm square section and an 8 cm finished design height. The centerlines sit 2.5 cm from the edges. The cap portion is 4.5 cm and the stem portion is 3.5 cm. Begin with a blank longer than 8 cm, then trim the excess after transferring the layout.
Do I need a printable template?
No. Work from a visual mushroom reference, preferably with front, side, and top views, then transfer the measured widths, heights, centerlines, and waste areas to the blank. For this simple example, a front view can be interpreted into the other views, but do not generalize that shortcut to more complex carvings.
Do I need a pelican knife or a particular gouge?
No single knife model is required. A curved or narrower carving knife can provide clearance in the tight cap transitions. Gouges with different widths and sweeps leave different texture marks, so test the available tools on scrap and choose the mark that fits this small cap. A pelican-style knife is a curved slicing knife, not a substitute name for a gouge.
Is the pyrography step required?
No. The face is first drawn in pencil, and the pyrography pen is an optional way to darken selected grooves and details. You can stop when the carving and pencil layout suit the result you want.
The strongest habit in this mushroom wood carving project is simple: remove a little wood, turn the piece, and look again. The layout protects the main dimensions, but repeated observation is what preserves the tilted cap, the off-center crown, the shallow underside, and the stem's visual balance all the way to the finished figurine.