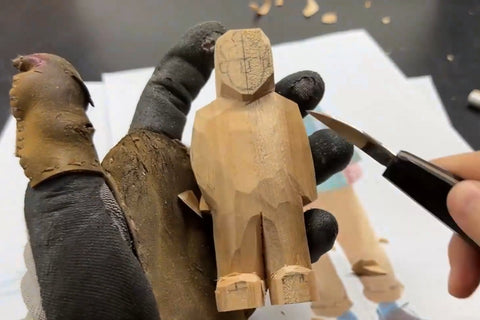
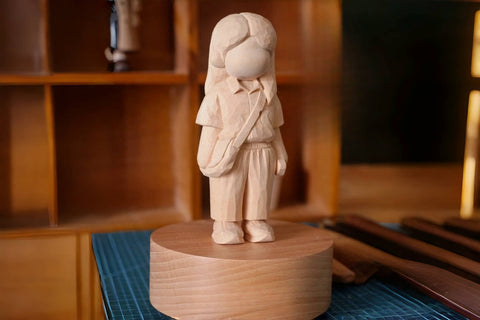
How to Draw a Wooden Figure for Carving: Proportions and Layout
To draw a wooden figure for carving, first build a clear reference, choose its proportions, and connect the front and side views. Then fit the design to the wood block and locate the clothing, hands, and feet from shared landmarks.
This guide shows three ways to prepare the reference, a clothed figure drawn on two different-sized blocks, and a grid method for copying matching views. It also shows how to restore the guide lines after the first cuts, so the drawing continues to help as the block changes.
Choose a way to build the reference views
Begin with reference material that helps you understand the figure from more than one direction. You can make silhouettes from a physical subject, work out the shape in a rough model first, or build a drawing from structural references. Choose the route that answers what is still uncertain about your design.
Make silhouettes from a subject you can view from several sides
If you have a physical object or model to study, photograph its front and side, adding a top or back view where it helps explain the depth or a hidden edge. Keep the subject in the same pose. Compare shared landmarks before treating the photographs as a matching set; a different angle or scale can change the apparent shape.
In a drawing tool, trace the outer contour or turn each view into a clear silhouette. Keep the original photographs beside the silhouettes so clothing overlaps and internal boundaries remain available. A silhouette gives you an outside shape; the original view helps you decide what the lines inside it mean.
Set the views to one intended figure height and keep their baselines aligned. Check both front width and side depth against the wood, then print the outlines at the chosen size. Position each print on its corresponding face and check the shared levels before using it to mark the block. The grid method later in this guide gives another way to copy the outline while preserving its proportions.
Make a rough model when the shape is hard to picture
If there is no physical reference and the profile is difficult to resolve on paper, make a rough study in soft modeling clay. Concentrate on the head, torso, limb directions, and any projecting hair, hat, or bag. Turn the model and adjust those larger masses until the front and side describe the same design.
Photograph the model from the useful views, then use the silhouette process above to prepare the outlines. The model lets you revise the volume before committing it to wood. It does not guarantee an error-free carving: the final design still needs room in the blank and suitable support for its projecting parts.
Build a structural drawing from several references
When you cannot photograph or model the whole subject, collect references for its overall structure and for the areas you need to understand. For a figure, that might mean a full-body pose, a side view of the head, and a closer look at the sleeve, hand, or garment you want to depict.
Start with the larger body masses and the directions of the limbs, then use shared levels to develop the corresponding views. Check how the parts connect before adding the outside clothing outline. Keep uncertain areas simple and leave room to revise them instead of treating one imagined contour as a final cutting line.
The proportion, joint, and clothing sections below develop this structural approach through a clothed figure. Whichever reference route you choose, the finished drawing should describe a shape that fits the wood in height, width, and depth. Resolve conflicting views before transferring more detail.
Choose a consistent style
Before deciding where the eyes or coat buttons go, decide what you want the figure to express. A realistic person, an exaggerated character, and an abstract figure can all work. Each needs a consistent relationship between its proportions, pose, and level of detail.

Use drawing to make those decisions while changes are easy. Compare the reference with the block and with the kind of finished figure you have in mind. Planning the major relationships first helps you avoid discovering a mismatch after useful wood has been removed.

It helps to separate proportion from structure. Proportion describes relative sizes, such as the head compared with the body or the upper arm compared with the forearm. Structure concerns how those parts connect and move. You can exaggerate their sizes while keeping the pose readable.

Compare realism, exaggeration, and abstraction

- Realistic: the figure follows observed proportions and gives close attention to muscles, hair, and clothing. Smooth transitions can make individual cut planes less prominent.
- Exaggerated: a larger head, nose, hands, or feet can carry the character, while the torso and clothing details are simplified. The pose still needs to work with those choices.
- Abstract: the gesture comes mainly from lines, masses, and the spaces between them. Very little facial or clothing detail may be needed.
The useful question is whether the choices support one another. A small body beneath a large head is a deliberate style when the limbs, stance, and expression belong to the same design.


Look at several figures together and compare what changes: the length of the torso, the size of the head, the thickness of the legs, and the direction of the pose. Those repeated choices can become a recognizable carving style.


Study the overall rhythm before the details
Angular or elongated figures do not need realistic proportions to feel coherent. Compare how their shoulders, waists, clothing, and feet support the same visual rhythm.


Gesture sketches are useful for this comparison. Follow the torso first, then the directions of the arms and legs. You do not need a finished portrait drawing to plan a small wooden figure, but you do need to know how the main parts relate.


Choose the head and body proportions
Use the head as a convenient measuring unit. Head length means the distance from the top of the head to the chin, without adding the height of the hairstyle. Total height includes the head itself. For shoulder width, use head width instead of head length.
Start with the kind of figure you want
Our short-legged figure below is about 11 cm tall and roughly 5.5 heads high. The longer-legged style is about six heads high, with a slightly enlarged head. These are design choices for the figures, not measurements that every person should match.


You do not need a whole-number ratio. A figure can be 5.3 or 5.5 heads tall if that suits its character. What matters is whether the parts look intentional together.
Check the body and limb segments
In the seven-head reference, think of one head above approximately three head units from chin to the pubic landmark and another three down to the feet. This gives you a simple starting framework for comparing the body below the head. Check it against the actual pose rather than imposing it on every figure.

Compare the upper arm and forearm next. In this reference they are similar in length, with the forearm a little shorter; the relaxed wrist falls near the upper thigh or pelvis. A bent arm changes where the wrist appears, so keep checking both linked segments.

Use the knee to compare the thigh with the lower leg. They are broadly similar lengths in this simplified drawing. If you shorten the legs for a compact figure, adjust both segments thoughtfully instead of leaving one unexpectedly long.

The relationship between shoulders and hips changes the silhouette too. Broader shoulders over narrower hips create an inverted taper; narrower shoulders over wider hips create a different balance. Choose from the person and style you are depicting. These shapes do not need to follow a fixed rule based on gender, and a large-headed cartoon figure may place much less emphasis on them.

Compare head counts and shoulder widths

For a relatively narrow shoulder line, try comparing it with about 1.5 head widths. Increasing that to 1.8 or two head widths makes it broader. A more powerful or exaggerated silhouette might use 2.5 or three. Treat those numbers as comparisons, not a cutoff beyond which a design becomes wrong.

| Total height | Possible effect |
|---|---|
| About 8–9 heads | An elongated figure, as in fashion-style drawing. |
| About 7–7.5 heads | A starting point for a comparatively naturalistic figure. |
| About 6 heads | A larger-looking head, with room to adjust torso and leg lengths. |
| About 5 heads | A more compact, youthful-looking or stylized figure. |
| About 1–2 heads | A strongly simplified cartoon in which the head dominates. |
These are drawing conventions, not a scale of ideal bodies or a way to determine someone's age. Use the reference and your intended style to decide where your figure belongs.

The Bojji figure below sits between those examples, at roughly 2.5 heads high. Its large head carries much of the expression, allowing the body to stay simple.

Place the joints for the pose
Mark the shoulder, elbow, wrist, and knee before letting clothing hide them. In a simple standing reference, the shoulder line slopes away from the neck, the elbow is near the waist, and the wrist is near the pelvis or upper thigh. These landmarks help you compare a pose; they are not fixed horizontal lines for every arm position.

For a hand-in-pocket pose, trace the connection from shoulder to elbow to wrist. Use the collarbone, chest, navel, and pelvis as nearby reference points. If the hand must reach a pocket, the upper arm and forearm still have to connect through a plausible elbow position.


Place the knee roughly between the pelvis and ankle in this simplified layout, then compare it with the reference. The knee and seat help establish the side silhouette. Later, trouser folds can reinforce those positions instead of being scattered across the legs.

For a raised arm, change the direction of the linked upper arm and forearm around their joints. Do not simply slide a finished sleeve shape upward. Check the shoulder, elbow, and wrist together after changing the pose.

Clothes, hair, hats, and bags make the outside silhouette more complicated, but the underlying checks remain useful: body proportions, limb lengths, and joint positions. A long coat or loose sleeve can cover a landmark without making it irrelevant.
Draw the head from the front and side
Small faces leave little room for an accidental mismatch. Start with the relative positions of the features, even when the final face will be simple. Pay particular attention to the eye spacing and the relationship between the nose, mouth, and chin.


Use thirds and eye widths as a starting framework
Draw a centerline, then divide the face into three approximate vertical intervals:
- Hairline to brow.
- Brow to the base of the nose.
- Nose base to the bottom of the chin.
The hairline is below the top of the head, and the brow line is above the eyes. Keeping those distinctions clear prevents the entire face from being compressed into the wrong area.

Across the front of the face, compare five approximate eye-width spaces: the outer side area, one eye, the space between the eyes, the other eye, and the other outer side area. Use the widest face area for the comparison rather than adding the ears as extra eye-width units.

In this guide drawing, the nose is about as wide as the space between the inner eye corners. The mouth line starts about one-third of the way from the nose base toward the chin, leaving about two-thirds below it. Adjust the mouth width, lip thickness, and feature spacing to the face or character you want; these guides are a starting layout.

Give the profile depth, hair, and a neck
Carry the brow and nose-base levels across to the side view. They give a useful starting height for the ear. Place the ear back from the front of the face and compare its position with the reference.

For a simple profile, think of a rounded skull mass above a tapered lower face. Sketch the projecting nose and let the mouth and chin sit behind its tip as the reference requires. This helps you plan depth before the head is shaped from a rectangular block.

Add the hair outside the skull outline. Short hair, long hair, and a side part each need their own space. Locate the neck beneath the jaw and behind the chin so that the hair, ear, and neck have room to meet.


For another carver's explanation of these facial landmarks and profile relationships, see Donald K. Mertz's Face Eye Study 2.
Fit the reference to the wood block
Bring your prepared reference views or structural sketches, paper, a pencil, a ruler, and a square. Choose a sound block large enough for the figure's front width and side depth as well as its height. Our guide to choosing carving wood explains what to check in the material itself.

Choose the orientation before drawing
Decide which end will be the head and which will be the feet. Check the grain on adjacent faces and consider how it will pass through the chin, neck, and other projecting parts. A narrow feature can break when the fibers give it too little support.


Lengthwise grain is a useful starting orientation for an upright figure, but a vertical line on one surface does not guarantee a smooth face or an unbreakable chin. Layout and cutting direction are separate decisions. Review how to read the grain and plan a carving before removing wood.

Adapt a seven-head reference to six head units
The reference for this clothed figure is approximately seven heads tall. For the first block layout, use six head units instead. Draw the vertical centerline and divide the height into six sections, keeping the cross-lines level.


This changes the figure's proportions. Uniformly shrinking a seven-head drawing would still leave it seven heads tall. To make a six-head design, keep the chosen head unit and redistribute the body below it.
On the printed reference, the head measures about 3 cm across and the shoulders about 7 cm. That is a little more than two head widths. We will simplify the shoulder-to-head relationship to 2:1 for the block drawing.

The block is 5 cm wide. Leave 0.5 cm at each side, giving a planned shoulder width of 4 cm. With the chosen 2:1 relationship, draw a head about 2 cm wide. These are this layout's dimensions, not a required size for every figure.

Mark the chin and draw the head between its width guides. Allow room beside the face for the ears and above it for the hair. Do not confuse the face boundary with the full outside silhouette of the head.


Locate the hairline, brow, nose base, and chin, then add the facial divisions. Check the head as a whole before carrying the drawing down the block.


Map the clothing from shared landmarks
Finish the head landmarks
Sketch the ears between the brow and nose-base levels. For the side-parted hairstyle, locate the part from the photo: in the front view shown here, it sits slightly left of the nose, with a shorter section of hair on the left and a longer section on the right.


Mark the nose a little generously so there is room to refine it when carving. A pencil line can still be changed; the important point is to avoid removing the wood needed for the projection.

Find the pelvis underneath the clothes
Below the head, mark the midpoint of the remaining five sections as the pelvis reference for this simplified figure. The trousers have a dropped crotch, so the visible crotch seam sits lower than the anatomical pubic landmark. Use the underlying body to locate the clothing, rather than treating the trouser seam as the center of the body.

In this pose, the coat hem and the fingertips are near that reference level. Mark their relationship on the block. A horizontal comparison is easier to transfer than several separate guesses about where each edge should end.

Locate the sleeve end above the hem, then extend its level across toward the vest. Mark the vest's lower edge above that line. Keep comparing the spacing with the photo as you compress the body into its new proportions.

The vest's center follows the centerline. Draw its lower point, then use that point to place the nearby coat opening, slightly to the left in this front view.

Compare the other sleeve level with the bottom of the trouser pocket. Once those marks are connected, place the hand that enters the pocket. Treat the sleeve, hand, and pocket opening as related shapes.

Check the arm against the block edge
Use the side of the block as a firm limit while comparing the outer arm. Draw the diagonal from shoulder toward sleeve and check whether its angle has enough room.


One angled arm in this reference wants to extend outside the available width. Mark that problem now. A front drawing that appears complete is not ready for cutting if part of the figure lies beyond the wood.

Finally, check the shoulder slope against the high collar. The neck is largely hidden in this design, so make the transition work with the clothing instead of forcing in an exposed neck.

Finish the hands, trousers, and feet
Separate the clothing layers and hands
With the outer silhouette established, draw the internal boundaries that will distinguish the coat, vest, arms, and hands. Use the centerline to keep the opening organized.

Follow the collar from behind the neck as it turns down into the front. At the underarm, the jacket folds outward, allowing the layer beneath it to show. Draw those as separate edges.


Follow the slight angle of the arm on the right of this front view, then locate the hand from it. The bottom of the hand is near the coat hem. Emphasize that boundary enough that the hand will not be mistaken for waste beside the coat.


Draw the trouser legs, cuffs, and shoe area
Mark the trouser crotch below the pelvis reference. The legs spread slightly in this stance. Follow the straight trouser shape toward the narrower cuffs; the pocket side can look fuller because of the inserted hand without requiring a thicker underlying leg.


The trousers are rolled at the bottom and expose a little ankle above the shoes. In this layout, reserve the bottom 1 cm for the shoe area. Keep the ankle narrower than the trouser leg and distinguish the cuff, exposed ankle, and shoe rather than merging them into one outline.


Use the bottom view to place the feet
Turn the block and draw the feet on the bottom face. For this stance, the toes turn outward. The footprint makes that direction visible in a way that the front drawing alone cannot.


Match each footprint to its leg in the front view. Check the heel, toe, and available depth together. Do not copy the apparent shape of a shoe in a photograph as though it were a flat cutout.

Resolve a pose that is wider than the block
Return to the arm that needs more space. The simplest design-stage choices are a wider block or an adjusted arm position. A small added piece of wood is another possible approach when you plan the joining surface and grain direction before shaping.

A glued addition needs a well-fitting joint and the adhesive maker's preparation, clamping, and curing instructions. Do not assume that a tiny contact area will be dependable merely because it has glue on it. Decide how the arm will be supported before cutting away the surrounding material.
Redraw the figure at 11 cm
Now use the same reference to draw a shorter version. Compare the completed taller layout, about 15 cm high, with an 11 × 5 × 3 cm block. The aim is to retain the character while making the body more compact.


Keep the head as the visual anchor and compress the body area below it. In this comparison, the span marked as four-and-a-half grid sections in the taller layout becomes three in the shorter one. The bottom 1 cm remains the shoe area. These grid divisions describe the two layouts; do not read them as the total head count.

Set the shoulder and head widths again, keeping the side allowance within the 5 cm block. Draw the head, its facial thirds, and the ears. Then repeat the side-parted hair and nose from the reference.


Find the pelvis reference again within the shortened body. Use it to position the coat hem and sleeves, then extend the sleeve level to locate the pocket. Bring the pocket hand slightly inward to suit the more compact proportions.


Complete the remaining lines in this order:
- The coat opening.
- The vest's lower edge.
- The shoulder and arm angles.
- The outside coat edges.
- The boundaries between each arm and the body.
- The outer trouser-leg lines.
- The rolled cuffs.
- The feet and hands.

Compare both versions. The head and body proportions differ, but the same relationships still locate the clothing. Try another pose on paper, then on a block, to practice finding useful landmarks instead of copying one outline from memory.

Transfer matching views with a grid
Use a grid when you want to copy the prepared views closely. Work with corresponding front, side, and back views of the same figure, using reference material you have permission to use. The grid transfers the design you have chosen; it does not decide the figure's proportions for you.
Check the scale and all three dimensions
Scale the views together, keeping the same total figure height and level baseline. Read width from the front view and depth from the side view. Do not enlarge the side view separately until it fills the block; that can make the two views describe different-sized figures.
For example, a design enlarged to 5 cm at its widest front point might measure about 13 cm tall. If the side view is also 5 cm at its deepest point at that same scale, the figure occupies an approximately 13 × 5 × 5 cm envelope. Choose the blank with room for that whole shape and any shaping allowance you need. Those dimensions belong to this example, not to the 11 cm practice figure.
Copy intersections one cell at a time
A grid gives you a manageable method of wood carving pattern transfer. It does not have to be a nine-square grid: use nine cells, twelve, or more if a finer division makes the lines easier to follow.
- Place a grid over the reference view. Draw the same number of rows and columns over the corresponding area on the block.
- Keep the overall proportions the same when you want a faithful transfer. Different-sized grids can preserve a drawing; stretching their width and height by different amounts changes it.
- Find where an outline crosses a cell edge. If it meets that edge two-fifths of the way along, mark two-fifths along the matching edge on the block.
- Find the next crossing. If it is one-third along the lower edge, mark that fraction on the matching lower edge. Connect the points with the same straight or curved shape as the reference.
- Work through the cells, then check the complete silhouette. Repeat for the side and back views.

Carry important heights around the block: the top of the head, chin, shoulders, pelvis, knees, and feet. Use those shared levels to register the views. The side outline supplies depth; it should agree with the front view about where each part begins and ends.
A finer grid reduces how much you have to judge inside each cell, but it does not correct an inconsistent reference. If the views disagree, resolve the drawing before transferring more detail.
Check the design before cutting
Turn the block through every planned view and check the whole figure before treating any line as a cutting boundary:
- Proportions: the head, shoulders, torso, and limbs belong to the same style.
- Pose: shoulders, elbows, wrists, and knees connect sensibly beneath the clothing.
- Views: front, side, and bottom agree about heights, depth, and foot placement.
- Material: the nose, chin, hair, arms, and shoes fit within sound wood, with their support and grain considered.
- Boundaries: hands, pockets, cuffs, and clothing layers are distinct enough to follow when shaping begins.
Clothing may hide the joint marks, but those marks still guide the direction of folds and the shape of a bent limb. Keep the original drawing available when shaping begins; the next example shows how to restore the guides that a cut removes.
Restore the guides after cutting the first view
Cutting away one outline often removes some of the drawing on the adjoining face. Before taking more wood away, restore the main levels on the new surface. This separate example uses a figure with a tall, asymmetric duck-shaped hat to show how the front and side drawings stay connected.

Choose a view that clearly establishes the main shape. In this example, the front is drawn and roughly cut first. That is one useful starting sequence, not a requirement to finish the front of every project before considering its depth.

Extend the surviving horizontal guides around the blank. A ruler or flexible tape can help carry the head and body levels onto the adjacent faces. Keep each guide at the same intended height; do not let it drift upward or downward as it passes a corner.

Add a vertical reference line to the newly exposed face, then place the side profile in relation to it. Use that line to check position and depth. It does not mean that every part of a side profile must be centered or symmetrical.
Compare the hat in the front and side views before cutting near it. Its projection is intentionally off-center, so simply mirroring the opposite outline could remove material the design needs. Keep that offset visible in the revised drawing and leave extra wood where the unseen shape is uncertain.

After another reduction, repeat the check: restore the lost guide, compare the neighboring views, and decide what remains surplus. A carefully controlled profile cut may establish an approximate shape on the opposite side of a simple design, but it does not remove the need to inspect that side or draw its different details.
Stop and correct the drawing if the head level no longer agrees across the faces, the body axis has drifted, or the hat has lost room in profile. A new line is easy to revise; a deep cut made from the wrong line is not.
If you would like a figure made from your own photo, explore our custom hand-carved figurines. Clothing, hairstyle, and pose can all be part of the design.