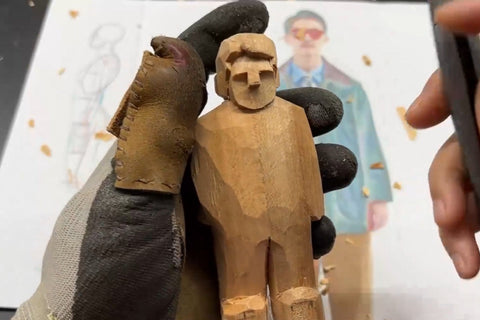
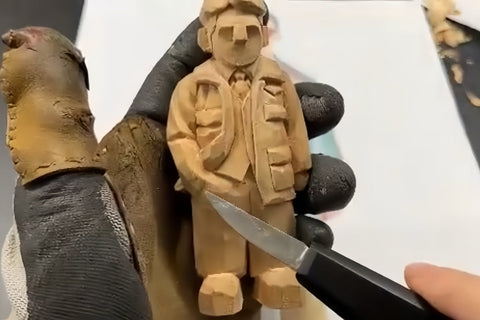
How to Rough Out a Wooden Figure
The starting point is a rectangular blank with the figure drawn on its front and side. The aim is to turn those outlines into a three-dimensional rough form while keeping enough material for the head, hands, clothes, and shoes.
This sequence follows one small figure with a straight arm on one side and a hand in a pocket on the other. The face and clothing will be developed later. Read the full outline, check the grain on the actual blank, and decide which marked areas are waste before beginning.
For the full sequence below, start with a solid block. A cutout already has the basic front and side outlines sawn out. Wood carving roughouts have more waste removed and a more developed three-dimensional shape. Before choosing cutouts or roughouts for carving this figure, compare their pose and head-to-body proportions with the design. Check that enough wood remains for the straight arm, bent arm, hand, pocket, and coat edge. Follow only the reductions that your blank still needs. If its shape cannot accommodate this design, follow a pattern or project suited to that blank.
Remove the first waste outside the drawing
Identify the shoulders and wrists on the drawing, then mark the surplus outside them. This example starts with a saw, a chisel designed to be struck, a suitable mallet, and a bench vise.


Secure the blank before sawing. Cut across the fibers through the waste beside the shoulders and wrists, stopping outside the final figure outline. Check the depth against both views and leave an outward margin.


Look at the grain where the waste approaches the head. In the close view, the fibers angle inward. A split following them could run into material intended for the face, so place the chisel farther out into the waste and leave extra room.

This demonstration uses a 25 mm flat chisel and a 20 mm shallow gouge. Choose a tool suited to the waste and available space. Keep the work clamped for mallet-assisted removal, and use only a tool designed to be struck. Take controlled reductions and inspect how each cut is running before continuing.


The flat chisel removed the shoulder waste a little faster in this trial, although both tools worked. Near the bottom, use the wider foot outline as the limit instead of following the narrower trouser legs. Keep the flat side of the chisel toward the reserved outline and remove only the waste outside it.

Where surplus remains, make another small reduction. Use controlled hand cuts for finer cleanup once the large waste has gone. The resulting blank still has broad flat surfaces and visible guides, with the lower foot block preserved for shaping.

Use the reference to decide what to keep
Compare the rough figure with the photograph before every substantial reduction. Look for the pose first: where the arms sit, how the coat hangs, and which masses overlap from the current view.

The painted figures below are separate examples of arm, coat, and pose relationships. They help explain what to look for; they are not later stages of the working blank. If a side or back is unclear, observe a similar garment or ask someone to hold the pose while you photograph the missing view. Keep that area generous until its shape is clearer.


Work from large relationships to smaller ones. Compare front and back, left and right, and upper and lower masses. Once those relationships are clear, choose one area to reduce, then step back and check the whole figure again.
Turn the front and side outlines into larger masses
Compare the front and side of the rough blank before reducing it further. When both outlines are reliable, use them together to judge waste. If a profile remains uncertain, keep that area generous while developing the larger masses.

The schematic compares an approximately eight-head figure with a version a little over five heads high. Its head is enlarged and its body shortened. The simplified outline on paper is about 11 cm high and 3 cm across; these describe this drawing, not standard blank dimensions. Keep your chosen proportions consistent across the views.

Group the carving into head, body and legs, and feet before worrying about clothing details. The painted figure is a separate comparison of these large masses; use your own drawing to determine their proportions.


Begin with a sharp carving knife and strop it as needed. Protect the holding hand, keep it clear of the blade path, and choose a grip that gives control of the next small cut.

Begin defining the neck just below the drawn jawline. In this example, the first boundary is about 1 mm below that line; this locates the cut and does not specify its depth. Use a shallow stop cut and a joining cut to separate the head from the torso, keeping enough wood to refine the neckline.

Each cut can remove part of a drawing, so restore the guides on the new surface. Compare the front, side, and back before taking another strip from the torso. Cleanly release the shavings as you continue separating the head and body.

Reduce the neck and torso while leaving room for clothing
Check what the figure wears behind the neck. A collar or hood occupies wood that would otherwise look like waste. Keep that material until the clothing boundary is clear. This figure has no hood behind the head, so the surplus can be reduced to separate head and torso.

Thin the torso gradually. Follow the larger body shape, turn the blank, and compare the two sides before trying to smooth every facet.

If a stubborn patch will not release cleanly when approached from the front or side, try thin cuts across its fibers. Cut the remaining attachment cleanly; do not pry the chip off and tear the body surface.

Mark the top of the foot area before narrowing the lower body. This example uses a guide roughly 1 cm above the base. Make a stop cut and a joining cut there to separate the feet from the legs; this reserves a rough foot block rather than setting the final shoe height.

Continue defining the feet while leaving enough depth for the toes and heels. Recheck the front outline after the first cuts so the feet remain beneath their intended legs.

Establish the hips, legs, and foot depth
Use the side view to compare the hip with the back and waist. On this figure, the hip projects behind the lower torso. Establish that larger relationship before reducing the legs beneath it.

Remove surplus around the leg area in thin, controlled push cuts. Keep checking the back so the legs do not become two thin strips behind an oversized front surface.


Locate the hip above the legs and behind the hand and forearm in this pose. Reduce the back of the legs beneath that area until the hip begins to project in the side view.


Measure the foot block from front to back if its depth is difficult to judge. The ruler photograph shows about 2.5 cm in this example. That is the depth being checked, not an amount to carve away or a standard human foot measurement.

From underneath, draw the heel and forefoot outlines. This design leaves the forefoot broader and gives the feet a slight outward angle. Remove thin shavings beside the outlines to separate the two feet. Follow your drawing for another pose instead of copying these angles automatically.

Check the side and front again. The hip now projects, the foot area is distinct from the legs, and the two feet remain under the intended stance. Leave the surfaces broad if the next reduction is still uncertain.


Now compare the arm and torso width from above. In a simple arms-down pose, their combined outline is broadly oval. On this figure, reduce surplus at the outer arms gradually while preserving room for the hand-in-pocket pose and later clothing details.

Block in the straight and bent arms
Compare the shoulder and arm masses with the reference. One arm hangs more directly downward, while the other bends toward a pocket. Their side profiles need different amounts of material.


On the bent side, keep the hand, pocket, and lower coat edge connected until their order is clear. The coat corner sits behind part of the arm in this view, so cutting a deep arm groove too early could remove the wood needed for the clothing.

The hand sits in front of the small coat corner in this view and enters the trouser pocket. Reduce the surplus around the hand while preserving that offset. Look from above as well as from the front to judge which surface projects.

Compare the shoulder heights with the head and reference. The shoulders in this mostly upright example are relatively level. Reduce the higher one a little if the blank has drifted from this pose; do not impose level shoulders on every figure.

Leave the arm and coat boundaries at a rough stage. The detailed head will provide another scale reference for the body, and the clothing work will return to the elbow, hand, and pocket positions.

The rough figure is ready for its next stage when the head, torso, arms, hips, legs, and feet can be read from more than one view. Keep the nose, ears, hair, hand, and coat-edge areas generous. The purpose of a roughout is to establish the larger relationships while preserving the material needed to refine them.