Carve the Body and Clothing of a Wooden Figure
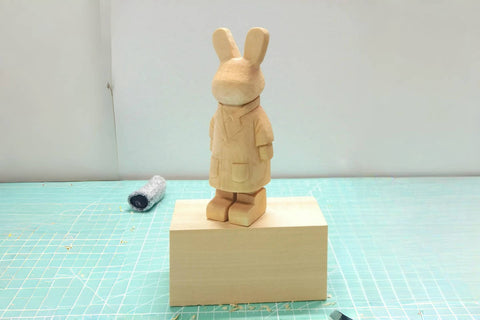
The head is already shaped, but the body is still generous enough to adjust. This sequence follows the same small figure through the arms, shoes, clothing overlaps, and final pose corrections. One hand sits in a pocket, so the arm, coat edge, and waist must be developed together.
Keep the reference visible and turn the carving as you work. A line on the front often continues around a side, but its height and direction depend on the garment and pose. Establish the larger relationships before deepening the pocket, collar, or individual fold.
Refine the arms without using up the clothing allowance
Mark the outer coat boundary, sleeve centerlines, and the division between the torso and arms. Compare the straight arm with the bent arm in the reference. Their visible widths and front-to-back positions differ because of the pose; do not force both sleeves into the same shape.


Reduce the surplus beside the torso in stages. In the back view shown, the torso stands in front of the arm surfaces. Lower the arm-side waste with a boundary cut and a joining cut, checking both the front and back. Keep the hand, pocket, and coat connection generous until their overlap is clear.


On this rough pass, bring the adjoining body and upper-leg surfaces into a coherent plane. Where the coat overlaps them, preserve its raised edge while lowering the surface behind it. The wooden edge is part of the carving and cannot be moved aside like fabric.

A boundary may take more than two cuts to release. If a shaving is still attached, make another controlled cut to free it rather than snapping it off and tearing the neighboring surface.

Pause with the larger arm and body forms visible. The elbow, hand, and clothing edges will still change, so leave the narrow areas slightly fuller than their intended final shape.
Locate the elbow, hand, pants, and shoes
Mark the bend between the upper arm and forearm. Then reveal the hand outline a little more clearly. The rough hand block in these photographs is oversized; reduce it gradually and use the reference to compare the hand with the sleeve.

Leave some material behind the hand and along the sleeve. The collar, pocket, and coat can affect the final arm outline, and the later photographs return to these relationships. A guide line is a plan to check, not an instruction to remove all the wood up to it immediately.

Next, distinguish the shoes from the pants. The reserved shoe blocks, about 1 cm high at this stage, are still tall for this short-legged design. Lower the toe area while allowing the instep to rise toward the ankle; shortening the shoe from front to back would change a different proportion.

Mark the pants-to-shoe boundary. Only a little ankle is visible in the reference. Keep that interval small so the pants do not read as shorts, then narrow the exposed ankle relative to the pant leg.


Compare both shoes from the front and side. The limbs and feet are now established well enough to develop the clothes, but they are not beyond further adjustment.

Map the five areas around the hand in the pocket
Start with the bent-arm side because several forms meet near one point: the arm and vest, pants and vest, vest and coat, coat and arm, and the hand itself. Find that meeting point in the reference, then locate it on the carving.


From the view shown, the visible surfaces step back from the vest to the pants, sleeve, hand, and coat edge. This order describes the local overlap in this pose. It is not a fixed order for every hand-in-pocket figure or for every viewing direction.

Draw the boundaries again with enough clarity to see where each surface should rise or recede. Make shallow initial cuts if the intersection is uncertain. A small reduction at the hand boundary can bring its outline inward while preserving room to revise it.

To separate two layers, make a stop cut along their boundary and a joining cut from the material being lowered. In this example, varying the approach of the joining cut creates the difference between the raised vest and the adjacent recessed surface. Remove the released shaving before deciding whether more depth is needed.

Continue the coat boundary toward the neck. Keep the line shallow where its direction is still being checked; a readable pencil guide is easier to revise than a deep groove.

Continue onto the other coat edge, collar, and tie
On the straight-arm side, reduce the pants surface enough for the coat to read as a separate layer. Trace the coat edge from the neck toward the hem. Its outline changes near the lower corner rather than falling as a single straight vertical line.


Use the same stop-cut and joining-cut relationship to establish that edge. Keep checking how much coat material remains above the recessed pants.

Mark the visible vest, necktie, and collar. For this mostly forward-facing pose, the facial centerline helps locate the opening below it. Check that guide against the torso before using it; a turned head would not automatically mark the center of the body.
The tie knot in this example is a small inverted trapezoid. Leave space for it while drawing the collar. Although a collar point can look triangular from the front, the collar also wraps around the neck, so continue the form onto the back.

If the hidden coat edge is hard to understand, observe a similar garment with an arm in the same position. Look for where the fabric is held, lifted, or folded, then compare that shape with the front, side, and back of the carving.

Follow the raised coat edge around the body
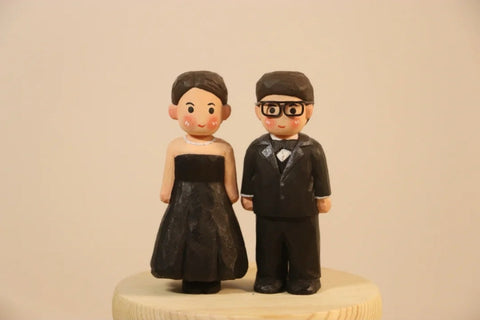
The painted figure in the comparison photographs is a separate example showing how a coat can fold around an arm. Use it to study the edge and silhouette; it is not the next stage of the unpainted carving.


On the working figure, draw the coat edge across the front and around the arm toward the back. Check that the line describes one connected piece of clothing rather than unrelated grooves on different faces.

Recess the pants beside the coat, leaving the outer layer visibly higher. At the turned edge, preserve enough material for the fold before trimming the adjoining area.

Use short, controlled cuts where a raised fold meets another surface. Protect the neighboring ridge and release the shaving completely rather than prying against the narrow coat edge.


Continue the check upward to the collar. The collar stands above the neck, including at the back, but its height should remain proportionate to this small head and coat.

Let the body shape guide the clothing depth
Check the shoulder slope before concentrating on smaller folds. A sleeve needs to follow the shoulder beneath it, and a small change here can affect the outline of the whole upper body.


Compare the outer coat with the vest and shirt inside it. Reduce the inner surfaces where needed so the coat remains the outer layer. Keep the remaining visible vest on the side shown in the reference; do not invent matching exposure on the other side.

Look at the belly and the lower front of the coat as connected volumes. If the pants project too far under the hem, lower that surface gradually instead of making the coat edge deeper and thinner to compensate.


The waist, pocket, hand, and hip are linked in this pose. When one boundary moves inward through carving, inspect the others before continuing. Reestablish the meeting point and the surrounding guides when necessary. Reducing the pocket area can make the visible vest narrower and shift this meeting point. Remark the nearby hand and hip outlines together so the revised front still agrees with the side.

Finish this pass with a side view. The surfaces should describe layers over a body, not a stack of equally deep channels.
Shape the fabric where the arm presses and lifts it
Compare the places where the arm meets the coat. The fabric is held close in some areas and lifted away in others. Use the reference to decide which visible edge stays high and which adjoining surface is reduced.


Refine the inner clothing below the outer coat a little at a time. A shallow, well-placed separation can explain an overlap without a large hollow behind it.

The reference shows the sleeve drawing the upper clothing downward. Deepen the necessary separation below the coat, then soften an angular outer corner with a thin shaving where the fabric should curve. Preserve the raised edge as you round its neighboring surface.

Turn the figure and follow the lifted coat edge toward the back. The red guideline slopes around the side rather than running straight across it. Keep the front and rear sections of this lifted edge on a coherent slope, with some relief above the pants.

Compare the sleeve, lifted hem, and back together. Preserve their connection rather than deepening every visible mark to the same level.

Recheck the waist and back against this pose
The elbow and waist positions provide useful checkpoints in this reference. Compare them before deepening the waist, and look across the back to judge the shoulders as a pair.


Deepen the clothing boundary where the garment tucks behind the arm. Follow the existing fold across the lower back with small reductions, keeping the front and rear waist levels consistent for this pose.

In this side-view drawing, the hip projects farthest, followed by the upper back, with the waist recessed between them. Use that relationship to judge this carving. Different garments and poses can change the visible waist, so compare the actual silhouette rather than making every waist the deepest point.

Round an unnecessarily flat surface over the hip when the reference calls for a fuller form. Keep the waist reduction modest until the coat volume, bent arm, and pants can be compared together.

Check the side silhouette after each adjustment. Small folds should support that silhouette rather than distract from an arm, shoulder, or waist that is still misplaced.

Refine pocket flaps and check the shoulders again
Mark the pocket flap before deepening its edges. In this example, the upper boundary stays relatively shallow while the lower edge casts a stronger separation from the coat beneath it.


Reduce the adjoining surface in small stages to create that difference. Keep a clear raised flap instead of surrounding it with an equally deep groove on every side.


Look at the inner vest and shirt once the pocket is clearer. Lower them only where they need to sit behind the coat, and remove unnecessary fold marks if they make the clothing look crowded.

Compare the shoulders from above and from the side. The back of an arm may still need to be reduced even though its sleeve already carries details. Preserve the intended pose as you make that correction.

The hand remains a simplified rounded form in this design. Clarify its relationship to the sleeve and pocket without adding individual fingers that are not part of the example.
Separate the collar, necktie, and inner shirt
The neck area has little working room, so choose a small, sharp blade that can reach the intended cut without forcing its tip against the neighboring surface. Support the work and use short, shallow cuts.


Compare the layers before cutting. In the marked reference, the collar points and vest edge stand forward of the tie and the small shirt areas beside it. Those exposed shirt strips need to sit lower so that the collar, tie, and vest remain distinct.

The knot stands higher than the tie blade below it. Make a small boundary cut at the inverted trapezoid, then lower the adjoining tie surface with a shallow joining cut. Protect the collar points on both sides while making this narrow separation.

Lower the small shirt surfaces beside the tie in clean, sloping cuts, leaving the tie as a central ridge. Turn the figure for access rather than forcing the tip into a tight corner. Then clarify the boundary between the lower face and collar so they do not merge into one mass.

Pause when the shirt, collar, and tie are distinguishable. Their separation should remain clear at the scale of the whole figure, not only in a close-up.
Finish the overlaps, then correct any remaining pose problems
Deepen the lower tie boundary where it disappears behind the inner clothing. In the front opening, one shirt edge overlaps the other; lower the surface beneath that edge to show the overlap. Trim the small surplus corner below it and clarify where the pants meet the coat.


Follow the shirt where it disappears beneath the coat, cleaning the edge without leaving attached fibers. Keep the pocket legible even where a strong fold reaches it. The fold ends beneath the pocket flap rather than continuing across the raised flap. Brush away loose fibers so these small boundaries are easy to see.

Locate the sleeve, hand, and pocket together. In this front-view reference, the bottom of one sleeve aligns with the bottom of the opposite trouser pocket. Restore that horizontal guide on the carving, then redraw the cuff and hand boundaries; earlier lines may have moved as the surfaces were reduced.

Use small joining cuts and stop cuts to separate the cuff from the hand below it. Round the hand from the front and side instead of carving individual fingers. Lower the surface beneath the pocket and thin the hand where needed so the pocket appears to hold the hand rather than lie flat beside it.

Check the elbow from the side. Here, the bent upper arm is too long compared with the other side, putting the elbow too low. Remark the bend and reduce the surplus to bring it upward. Finish with thin shavings where a hard fold corner should soften, choosing the cutting direction from the grain and your grip.

Make one final circuit around the figure. Check where the sleeves end, whether the bent arm connects naturally to the pocket, and whether the coat edge continues coherently across the side and back. Look again at the shoulders and elbows: fine clothing details do not prevent a larger pose correction from being necessary. Stop adding grooves when the existing overlaps already explain the clothing.