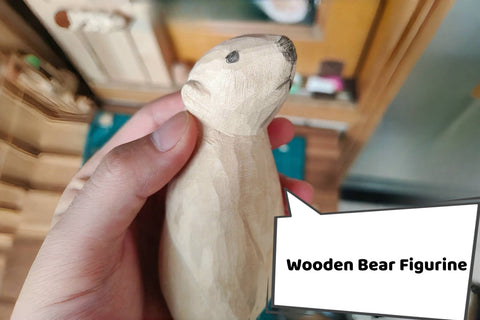
How to Whittle a Bear: A Waving Polar Bear Project
Learn how to whittle a bear with a waving pose. Start with a rectangular piece of basswood, lay out the shape, remove the larger waste sections with a hand fret saw, then refine the head, body, arms, and legs with a carving knife.
This is an intermediate project. The main challenges are keeping the proportions consistent and shaping the places where the head and limbs meet the body. The 20 GIFs below follow the work through the final knife cuts.

Choose a Bear Carving That Fits Your Skills
This polar bear carving is a standing character with one arm raised. Compared with a compact figure whose arms stay close to its body, the raised arm and the spaces around the limbs create more boundaries to protect and tighter places to reach with the knife. Choose it when you are ready to work around those parts a little at a time.
For your first knife session, begin with a practice block and basic cuts before taking on this figure. If you already control short cuts, use the front and side layouts below to plan the body, then alternate between the arms and torso as you round them.
Keep the waving pose clear
The raised arm gives this bear its gesture before you carve any facial detail. Keep that pose clear as you lay out the front and sides: the arms occupy different positions, and the side views determine how much depth remains for the head, limbs, and body. The knife work then turns those flat-sided parts into connected, rounded forms.
If you have practiced basic whittling cuts, this is a chance to apply them to a more involved figure. Prepare for both the saw work and the knife work; shaping the narrow spaces around the arms takes more control than simply rounding an open edge.
What you’ll need
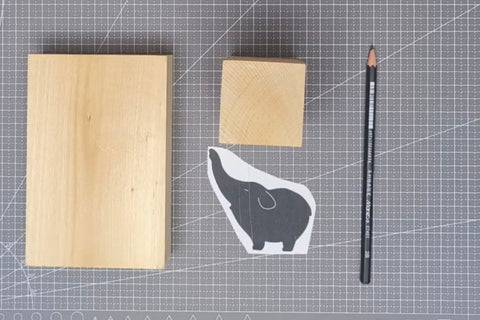
- A rectangular basswood block sized for the bear you want to make
- A pencil or marker for outlines, centerlines, and waste marks
- A hand fret saw and a secure support or vise for the sawing stage
- A carving knife for rounding and refining the shape
A carving knife or chisel can also remove the roughing waste, but the hand fret saw makes the larger cutouts quicker to remove.
Before starting, review carving knife safety. Keep your supporting hand and body out of the blade’s path, support the work securely, and use small, controlled cuts. Practice the basic knife cuts first if you cannot yet control where a cut starts and stops.
1. Sketch and cut the front outline
Draw your own front-view outline on the block, using the bear above as a reference. Include the rounded head, ears, raised arm, other arm, body, and legs. Choose the overall size before laying out these parts; there is no fixed block dimension for this project.
Secure the block and cut around the front outline to create the flat-sided blank. Our carving tools and saw setup guide explains matching the saw and vise to the work. The next step is to give that silhouette depth.
2. Mark the side layout
Mark the head, ears, arms, and legs on the blank, leaving the central area for the body. Add a centerline halfway across the side. Bold lines make the layout easier to follow as you work around the piece.


Ears
Place the ears behind the side centerline. Draw a semicircular outline for each ear and mark the surrounding excess wood as waste.
Arms
In the side layout, give each arm roughly two-thirds of the available depth. Make it narrower at the top and thicker toward the lower end, with a gradual transition. Mark the excess on either side for removal.
Legs
Divide the side depth of the leg area into three equal sections. Keep the middle third and mark the outer thirds as waste. Use solid outlines for the shape to keep and dashed or hatched marks for the wood to remove.


Before sawing, turn the blank between the front and side views. Check that each side outline still leaves wood for the raised arm, ears, and legs you drew from the front. The side divisions guide the depth of these parts; they do not replace the front silhouette. Correct a conflicting line before removing the waste. Use our grain direction guide to check how the fibers run through the raised arm and legs.
3. Saw away the marked waste
Hold the blank securely in a vise or suitable support. Working from the side, use the hand fret saw to remove the marked waste around the head, ears, arms, and legs. Follow the outlines while keeping the wood inside them intact.

You now have the main body parts roughed out. Switch to the carving knife for the rounded surfaces and the transitions between them.
4. Mark the nose and centerlines
Mark the nose near the center of the face: it will project farthest forward. On the back, circle the fullest part of the head. Keep these two areas in mind as you remove the surrounding corners.

Draw centerlines on the front and sides, including the head, body, arms, and legs. These lines help you judge the remaining shape as the flat faces become rounded.

5. Round the head and define the neck
Start at the face edges and carve toward the ear area, taking small cuts to round the upper face. Stop the cuts before they run into the ears. Turn and support the piece so the blade’s path stays clear of your hand.

Continue around the lower face and neck. Keep the nose projecting at the front while forming a clear boundary between the head, neck, and body.


6. Shape the body and arms
Begin rounding the body by removing its outer corners and gradually working toward the middle.

When an arm blocks access to the body, shape that arm first. Use its layout lines to guide you as you remove the corners and make the arm rounder. Then return to the body where you have opened up room for the knife.


Repeat on the other side: round the second arm when it obstructs the knife, then continue shaping the body. Work back and forth as needed rather than trying to finish the whole body before touching the arms.


7. Carve the legs and refine the shape
Round the legs along the layout lines and blend their outer surfaces into the lower body.


Define the boundaries where the legs meet the body. Deepen these areas gradually with small, controlled cuts so the legs remain distinct. Refine the feet and the space between the legs without forcing the knife.


Turn the bear and inspect it from the front, back, and sides. Refine uneven spots with the knife, paying particular attention to the head-to-body and limb-to-body transitions. Aim for a rounded shape with clear proportions and smooth connections between the parts.

Check the finished shape from every side
For this polar bear wood carving, the pose and the connected rounded forms carry the design. Check them before taking another finishing cut.
- From the front: keep the raised arm distinct and check the head, body, and legs against the pose you laid out.
- From the side: check that the nose still projects and the back of the head retains its rounded fullness.
- Around the limbs: look for abrupt corners where an arm or leg meets the body. Refine the transition while preserving the boundary between the parts.
- As you turn the bear: check that a correction looks right from the neighboring view before cutting more wood away.
Prefer a finished bear for your shelf? Our Sitting Polar Bear Wood Carving offers a seated pose, with a white body and black paw pads.
Common questions
What wood should I use?
Use a rectangular basswood block for this project. Choose its size to suit the finished bear you want to carve.
Do I need a printed pattern?
You can draw the front outline yourself using the bear’s silhouette as a reference. Check the proportions of the head, body, arms, and legs before cutting the blank.
Is this a beginner project?
It is an intermediate carving. A newer carver can work toward it with practice, especially by learning to control small cuts and shape the joints between body parts.