Carving Wooden Gifts: Shaping Legs and Feet Like a Pro
Hey everyone, this is Wooden Smile. We’re back to keep learning how to make one-of-a-kind handcrafted wooden gifts. In this post, we’re going to talk about how to carve the lower half of a wooden figure, so the legs, butt, and feet are clearly separated from one another.
First, let’s look at the side view. We’ve already carved out the basic shapes of the head, body, and feet.

Now if we look at the back, the drawing shows that the butt sticks out the most. So, compared to that, the thighs, calves, and feet should be carved inward a bit.

We’re continuing with the push-carving technique to make the legs look more rounded.

Let’s take a closer look—the butt is roughly behind where the hands and forearms are, which is right about here in the diagram, just above the point where the two legs meet, right?

So we should carve a little deeper here and shave down the area below the butt. That way, you’ll start to see a slight curve that represents the butt from the side view—but it’s still not quite enough.

So how much should you carve away? Based on our experience, it’s usually around 2.5 centimeters—that’s roughly the standard length of a foot.

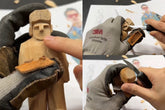
While you’re carving, you might notice that the gap between the legs is still a bit too narrow. In earlier tutorials, we mentioned that people’s feet naturally point outward. To reflect that, you can sketch it out lightly. Remember, the heel is smaller than the ball of the foot, so feel free to draw it a bit exaggerated—it’s just a rough outline for now. After sketching, shave off the extra wood around it with a few thin slices. This helps separate the two feet and makes your figure look more like a real person from a photo. Quick tip here: whenever you’re doing any kind of carving for wooden gifts, be sure to wear gloves or at least put a thumb guard on.

At this point, from the side view, our little figure is really starting to take shape. The butt sticks out slightly more than the torso, and the foot is clearly separated from the leg. If your figure looks like the one in the diagram, you’re at a good stopping point. For beginners, if you’re not totally confident about what to do next, this is a solid place to pause.

Next, we can gradually slim down the arms on both sides to the right thickness.
You’ll notice that the body is usually a bit wider than the arms, so we can bring the arms inward a little.

In this step, we haven’t drawn any edge lines yet—that is, the lines that separate the arms from the body—but we can just carve while observing the shape. From a top-down view, if the arms are hanging naturally, the figure looks kind of like an oval. So we just need to narrow the sides of the arms inward.

Alright, that’s it for this post. In the next one, we’ll keep working on refining the figure’s arms to make them look smoother and more polished. Stay tuned for more handcrafted wooden gift tutorials from Wooden Smile!


