Wooden Gifts: Carving Heads and Facial Details for Beginners
Carving the head of a wooden figure is actually a bit trickier than carving the body—especially when it comes to the facial features. If you’re aiming to make a realistic-style wooden gift, it’s going to take a lot of practice. We don’t really recommend going for a super realistic style on such a small wooden figure, but if your skills get really good later on, you can definitely try adding more lifelike details to smaller pieces.
When working with basswood, which is a softer material, it’s even harder to carve fine facial expressions because the wood can break pretty easily.

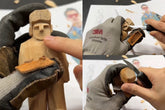
Alright, let’s stop talking and start carving—let’s begin with the head and start making your own wooden gift! From the side view, your wooden figure probably still looks pretty blocky. You can start by cleaning up the hair a bit and rounding out the head shape. We usually round off the back of the head first, then flatten out both shoulders so there’s a clean, defined line. By the way, before you start carving the face, it’s a good idea to go over your guide lines and make them a bit darker.

We usually start with the nose. From the side, the nose is the highest point—especially the tip—while everything else curves inward, so the nose has to stick out. For the nose to really stand out, the face needs to be carved in a bit.

Use the tip of your knife to make two stop cuts on either side of the nose. You don’t have to go very deep—just about two millimeters in. Then flip the head upside down to cut across the grain. Use the knife tip to gently scoop upward and shave off a thin layer. Clean it up afterward.

Repeat the same process. We still feel like it’s not deep enough, so let’s keep shaving it down little by little. Don’t press too hard—the facial area is really small, so the margin for error is low.

Same on this side. You can use the pulling technique we talked about in earlier tutorials, or the reverse hook method with your index finger. Just remember to always pull away from your palm. Whatever technique you’re using, please make sure to stay safe while carving your wooden gift.

Keep carving downward. You can also use your thumb to pull like this. Once you’ve carved to a point that feels about right—roughly three millimeters deep—shave off the bottom of the nose and smooth it out so it’s flush with the face.


